The interface of Kubla Ports is briefly overviewed in this section. Each part of the process is elaborated on in subsequent sections of this help file.
The main window of Kubla Ports is shown below. The controls of this window are described underneath.
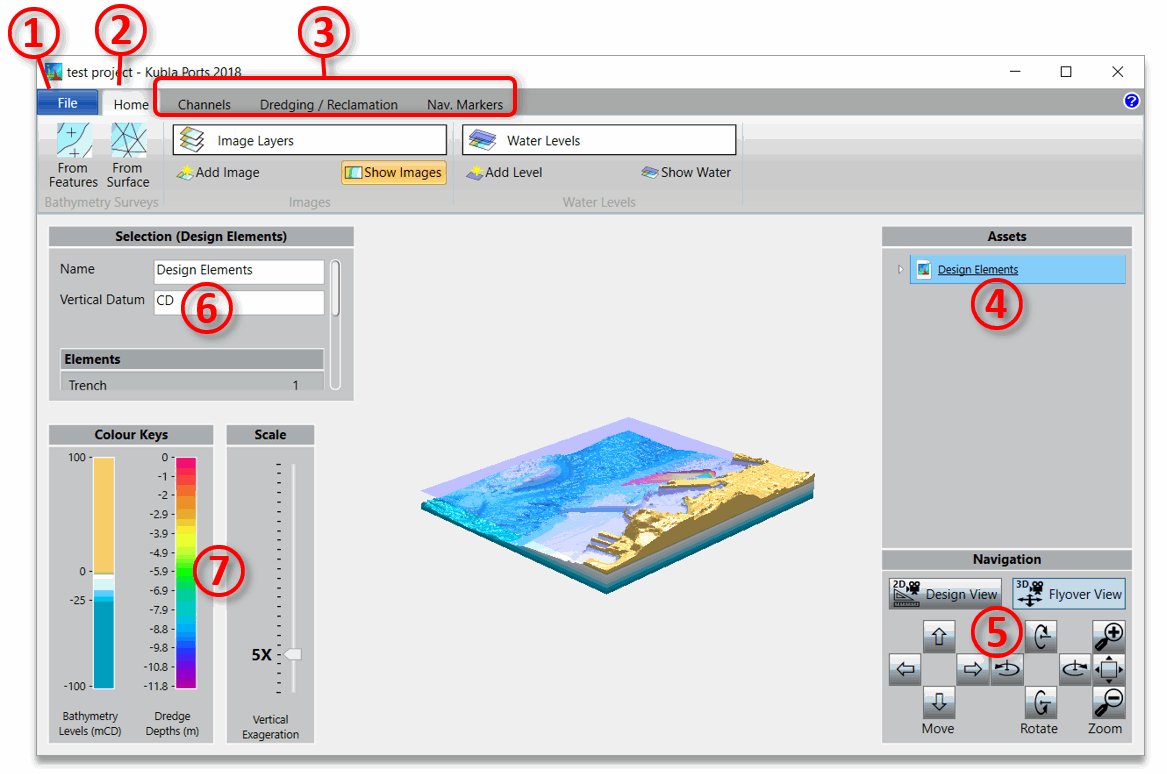
- ① The file button is used to save and load files. Software options, such as units, licenses and the background colour, are also accessed here.
- ② The home tab contains the tools to define project bathymetry, site plans, and water levels. For further details see Defining Bathymetry, Defining Image Overlays and Defining Water Levels
- ③ The remaining tabs shown will only be visible if you have activated the relevant modules of the software. They contain the tools for those modules. For further details see Channels Module, Dredging & Reclamation Module and Navigation Markers Module.
- ④ This box will display all of the project data in a tree structure. For further details see Essentials
- ⑤ Navigation. These buttons can be used to navigate the screen as an alternative to using the mouse. For further details see Navigation
- ⑥ This box will display details of the selected item.
- ⑦ This section is where the display of the project is controlled. Note that only controls relevant to the content you have loaded into the project will be shown here. E.g. bathymetry shading controls will not be displayed until you have loaded bathymetry into the project. For further details see Display