
Kubla Cubed Guide:
Importing CAD Data
july 2026
Getting CAD data into Kubla Cubed is one of the fastest ways to build a site model and start calculating cut and fill volumes. In this guide, we’ll walk through the import process, explain how Cubed works with your data, and share a few practical tips to help you get the best results.
Start with the Right Expectations
We’ll start with the basics: what is a CAD file?
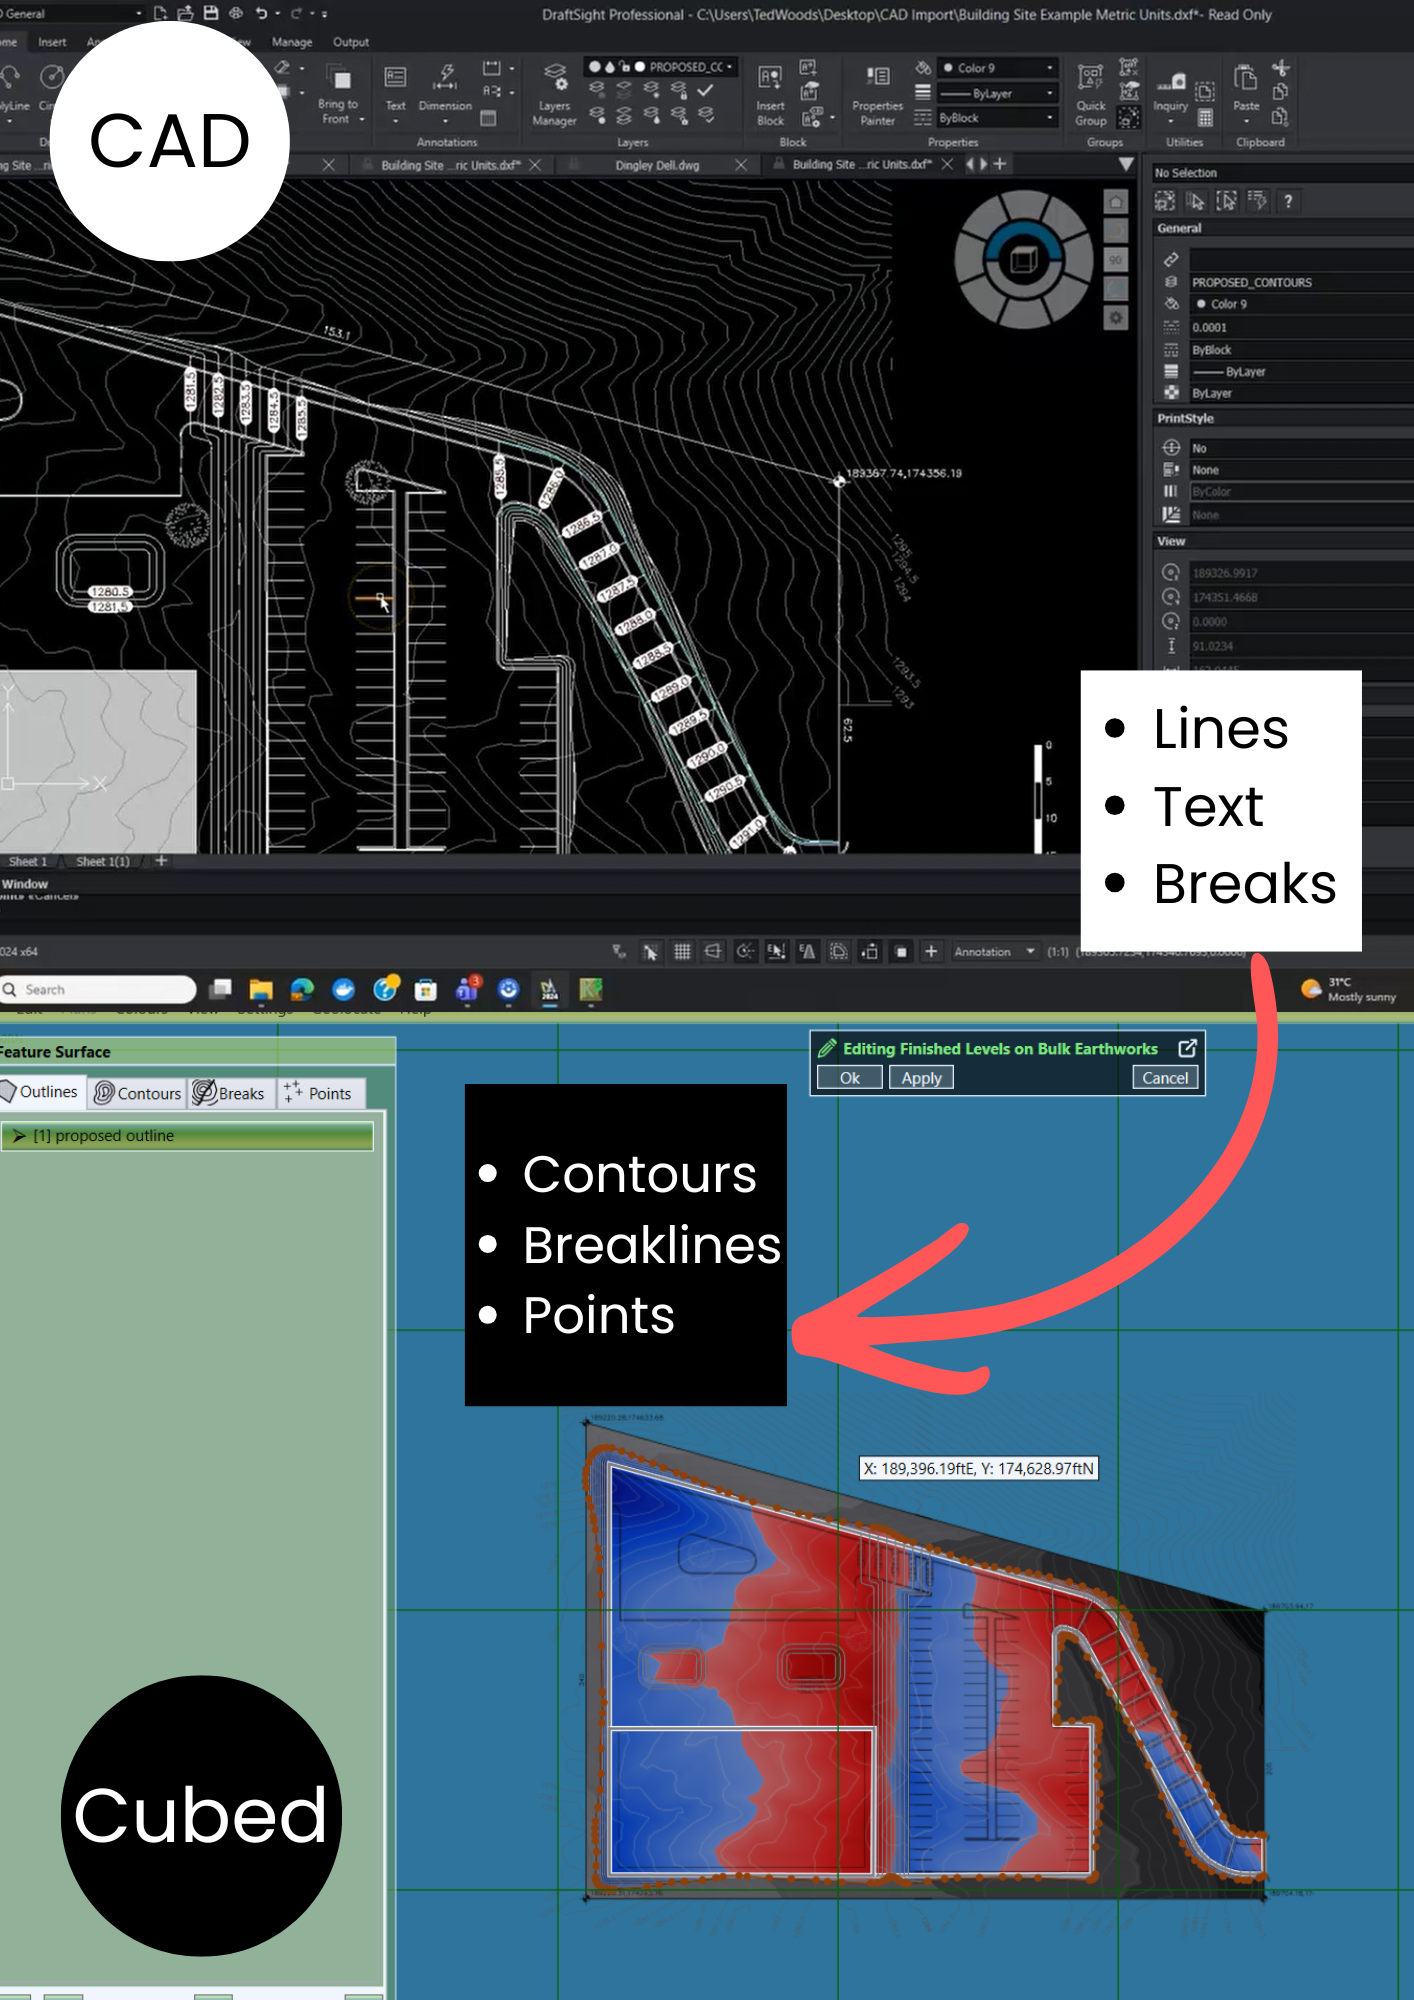
CAD files, commonly used within the architecture and engineering industries, store 2D and 3D design data for precise digital modelling. CAD utilises geometry such as lines, text and blocks to create accurate drawings of real-world products or designs.
For our purposes, CAD files typically contain a lot more baked-in data than PDF files, which can speed up the import process quite significantly. Using CAD data within Kubla Cubed entails interpreting that geometry and converting it into the software’s own native elements: contours, breaklines or points.
When the file is well structured, this works very smoothly. When it isn’t, you will need to guide the process a bit more carefully. Don’t panic – this is completely normal, and once you understand how the importer works it actually becomes very predictable.
Step 1: Add the CAD File (and check it!)
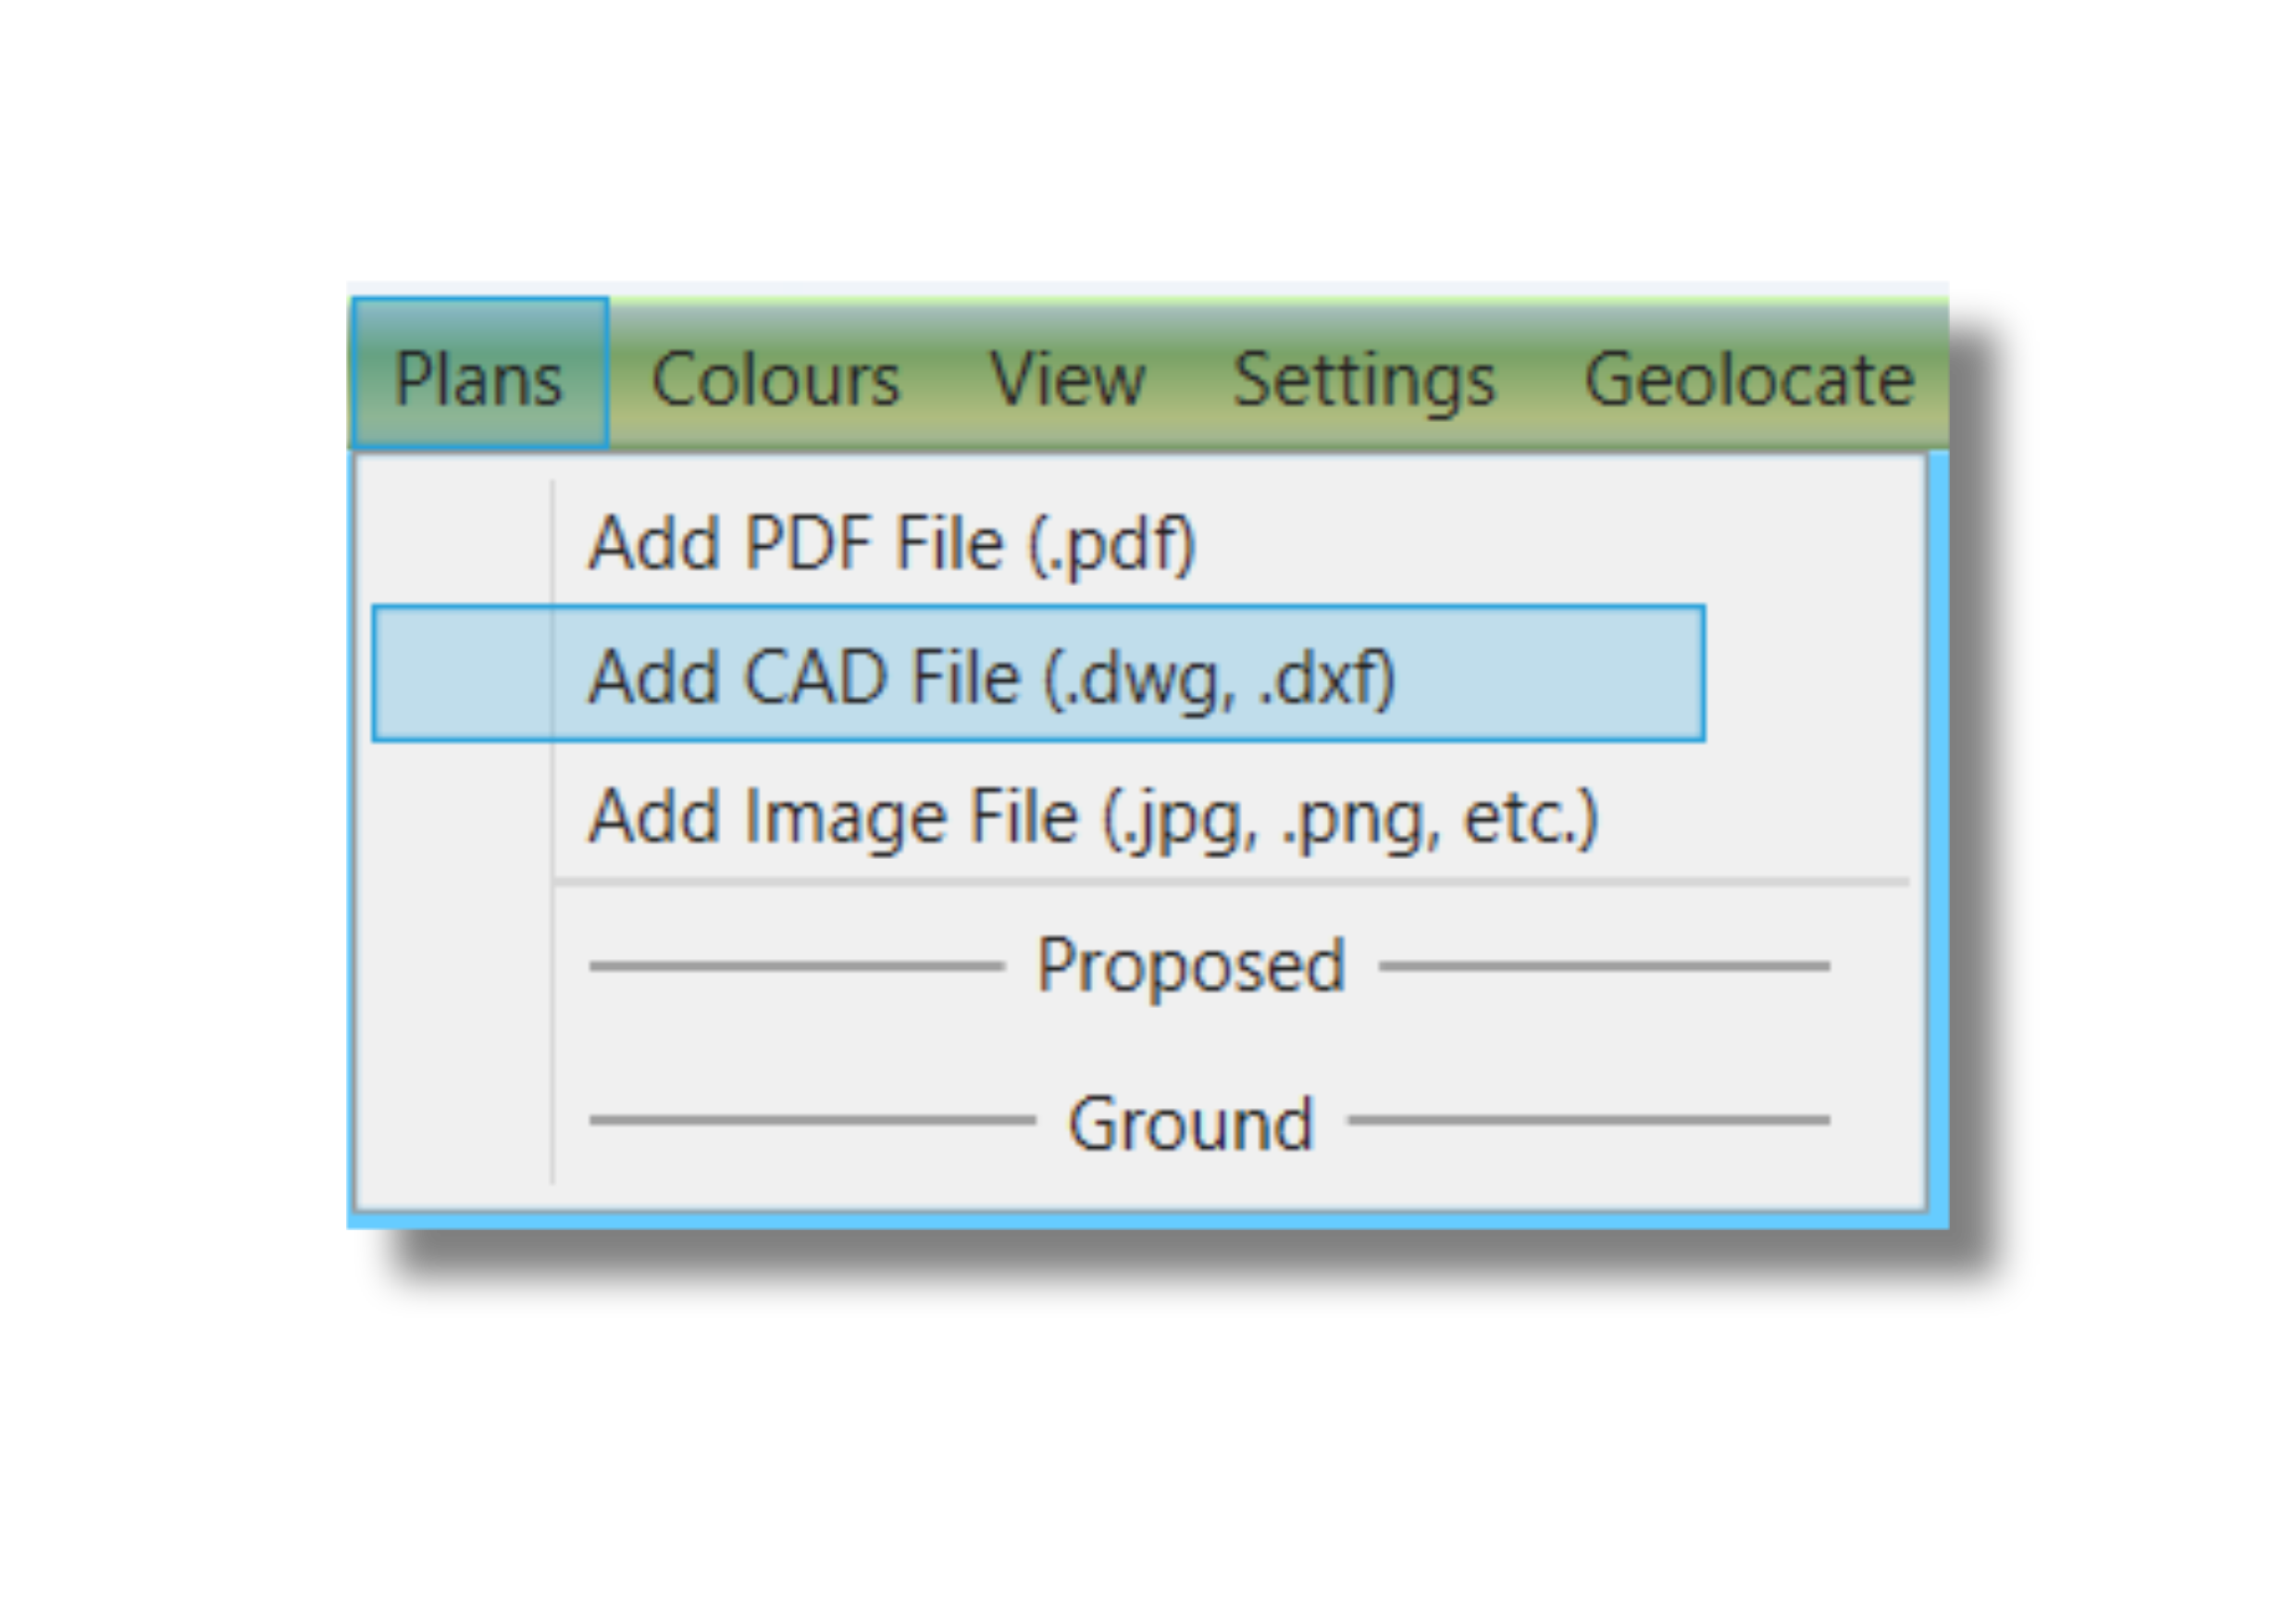
The first step is to bring the file in as a Site Plan using: Plans → Add CAD File
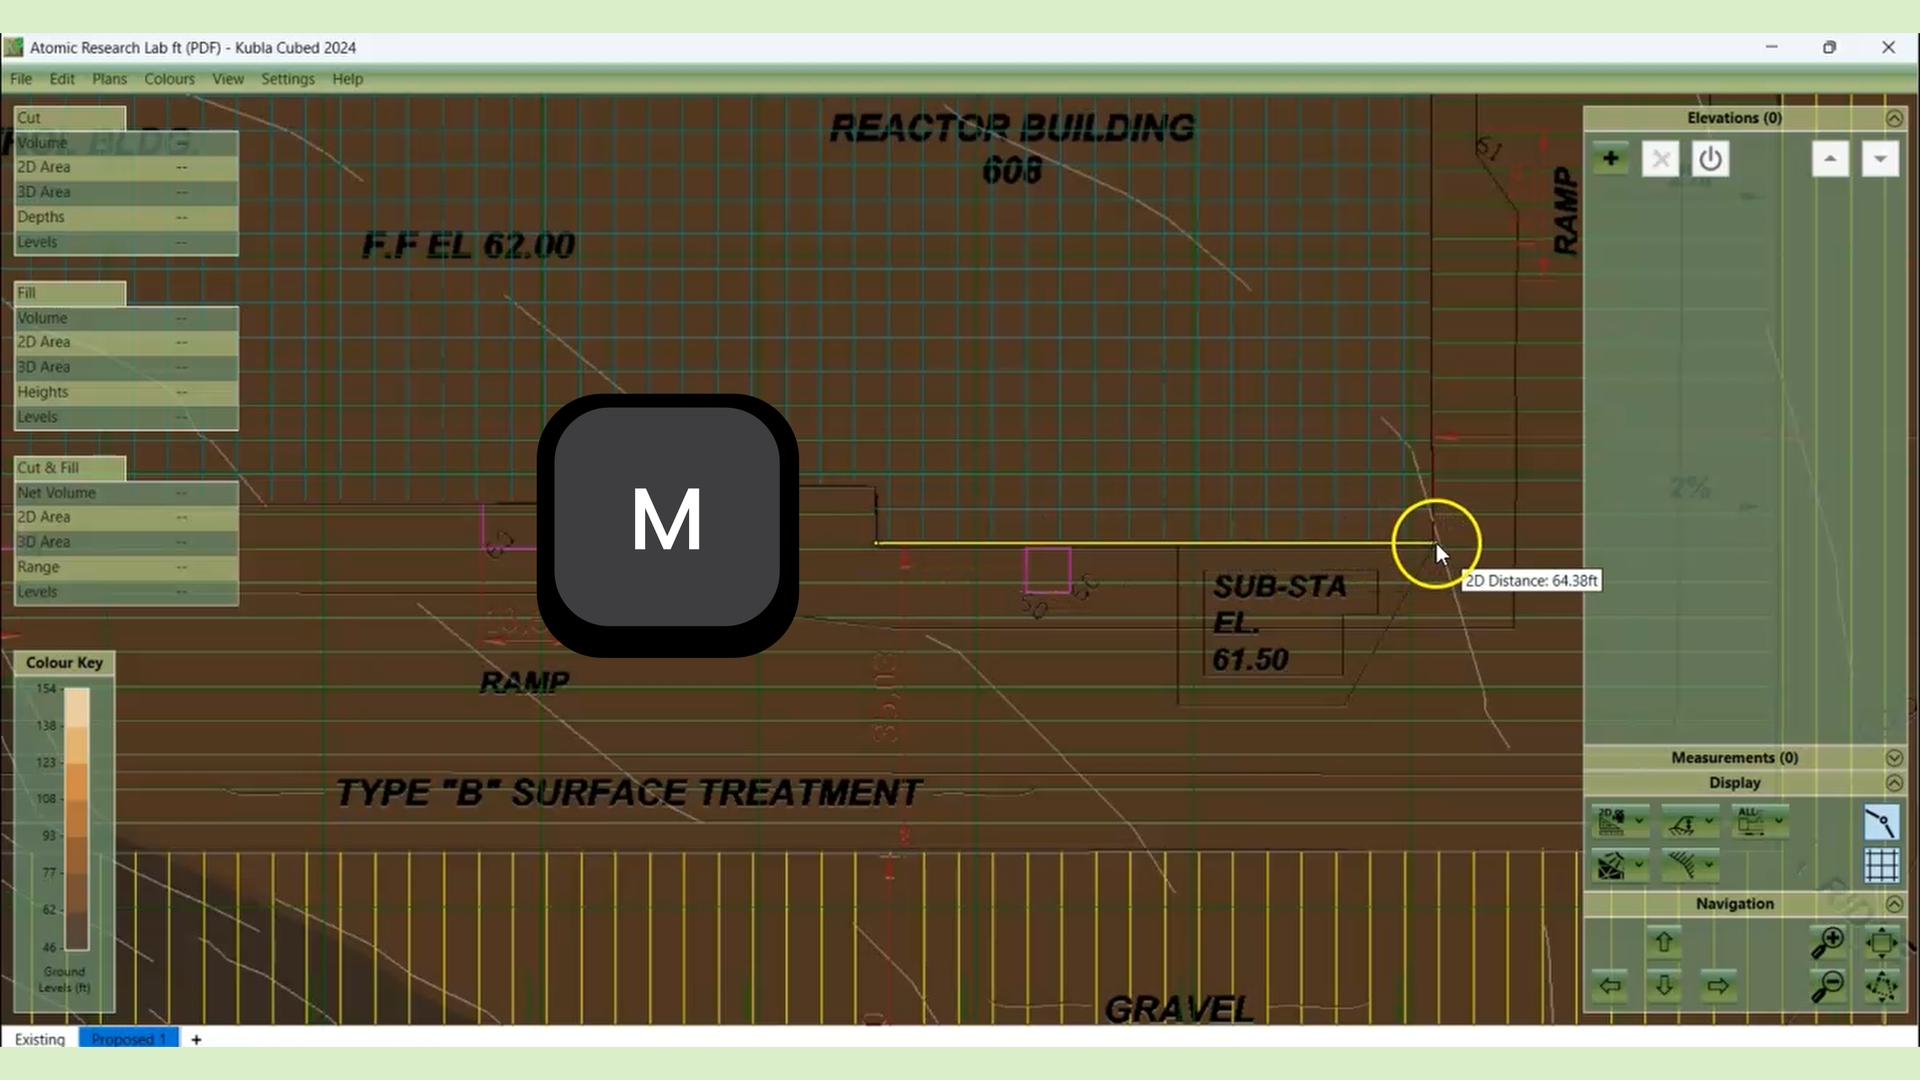
Take a moment to check it before moving on. This is something we emphasise in the video because it often prevents problems later.
Check the scale by holding down the M key, then measure a known length. CAD files are usually scaled correctly but not always. It’s also worth checking the units as the insertion units in CAD are often unreliable.
Tip
If the scale is wrong here, everything that follows in your project will be wrong too. It’s really worth getting this right from the start.
Step 2: Choose what to import
Most CAD files have far more points than you actually need, so this is an easy win. Simplifying reduces the number of points while maintaining the overall shape, which improves overall performance with minimal detail loss.
Kubla Cubed works feature-by-feature rather than importing everything at once.
In the video, we start with contours:
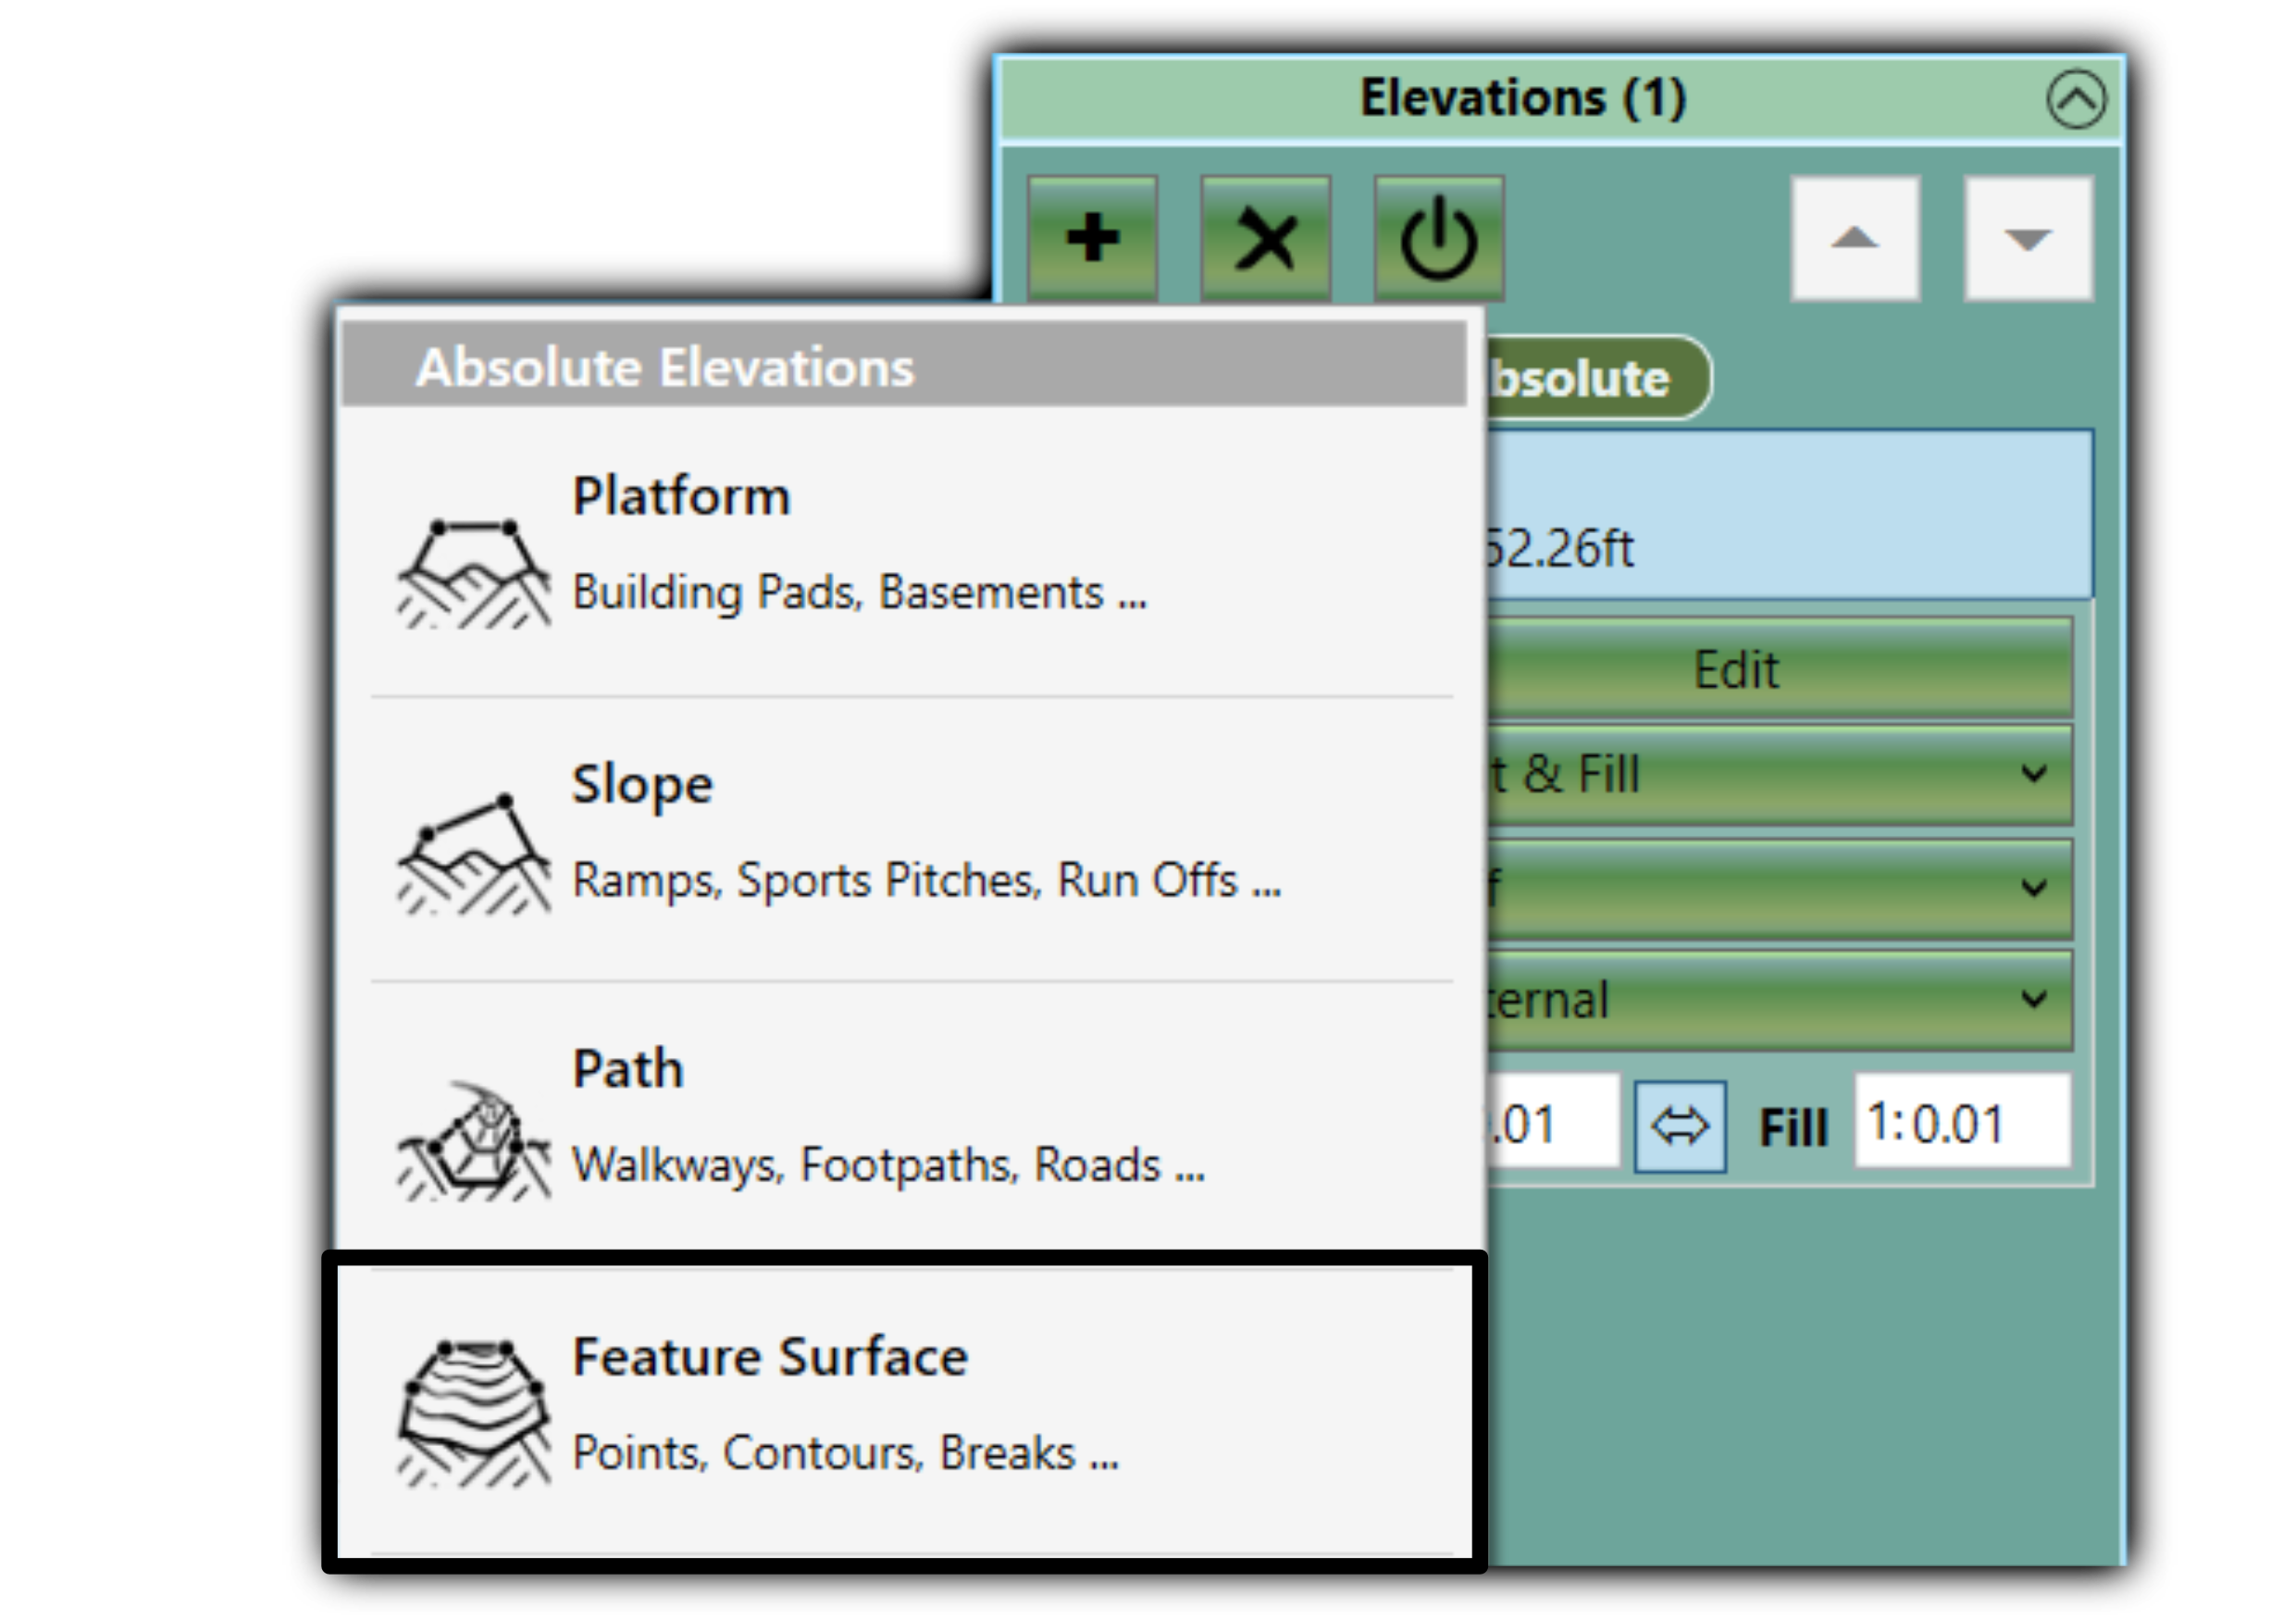
Create a Feature Surface
In the Elevations panel, press the + button and select ‘Feature Surface‘.
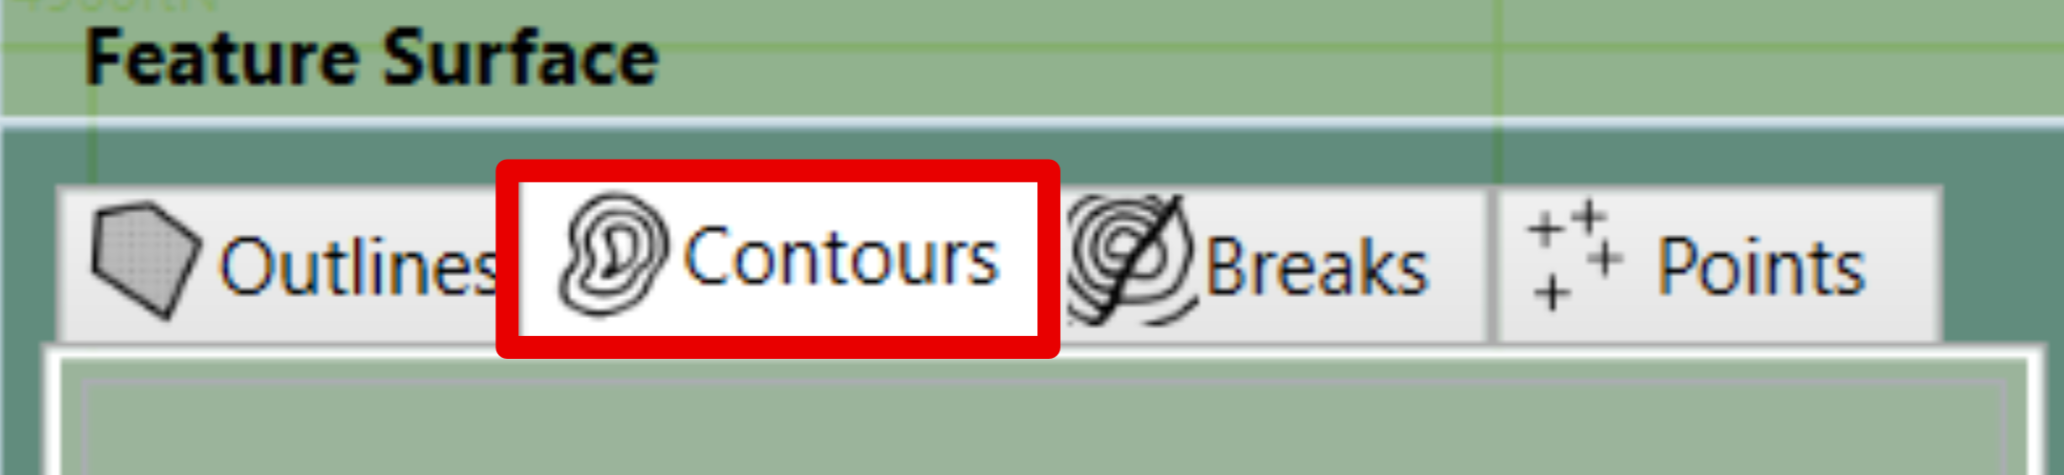
Select the Contours Tab
The Take-Off Editor will open on the left of the sofrware. Navigate to the Contours tab.
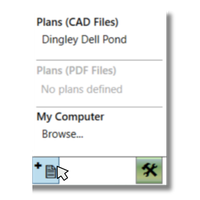
Extract from Site Plan
At the bottom of this panel, select the ‘Add from Site Plan’ option, then choose the relevant site plan from the list.
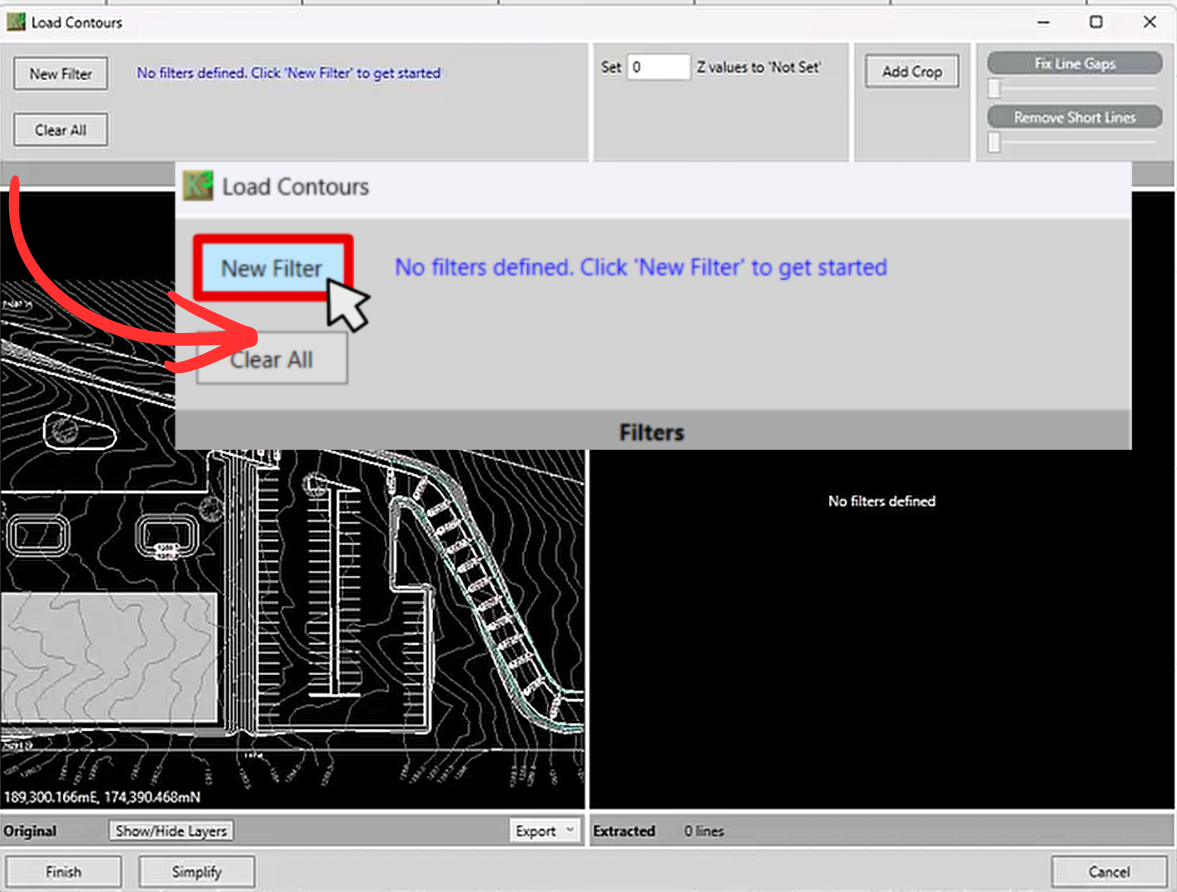
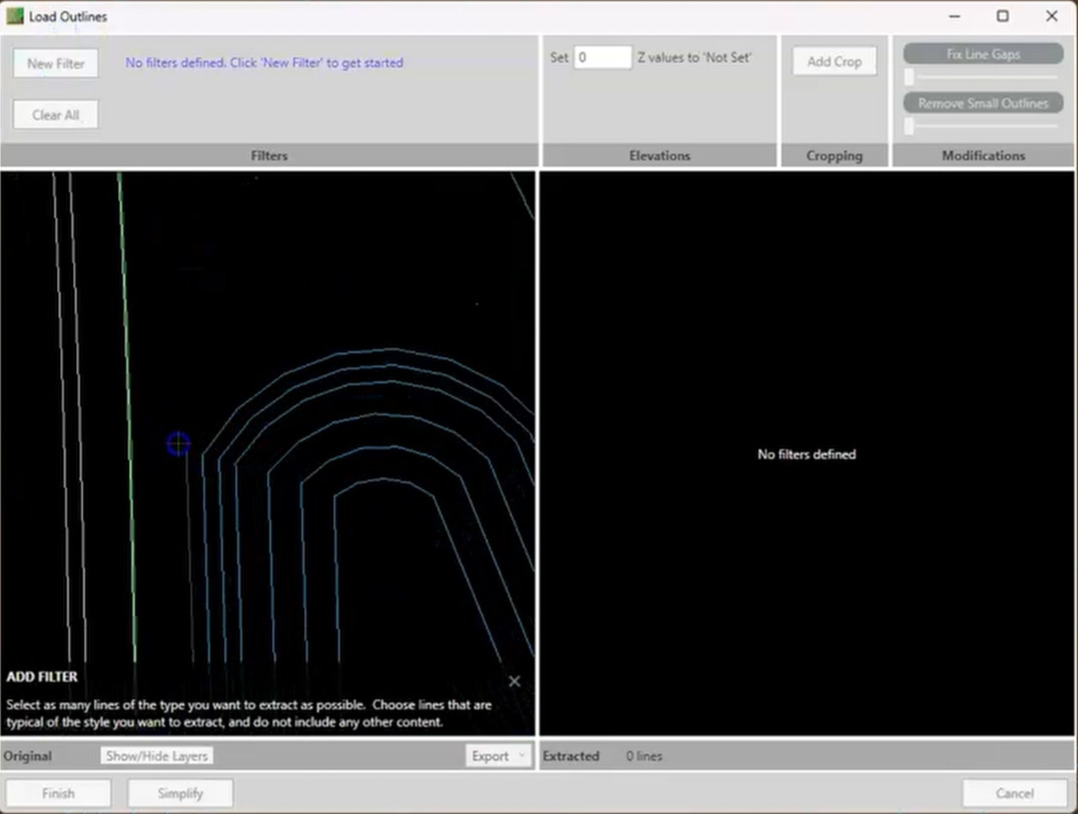
At this point, the importer window will open and display the selected CAD file entities. The left-hand window will display the file data in its entirety, whereas filter-specified data will display on the right.
Step 3: Build a filter
Most CAD files have far more points than you actually need, so this is an easy win. Simplifying reduces the number of points while maintaining the overall shape, which improves overall performance with minimal detail loss.
Filtering is the key step. Rather than selecting the whole drawing and hoping for the best, you’re showing the software an example of what you want.
- Select ‘New Filter’
- Zoom into a small representative area
- Select 1 example element
- Let Cubed identify similar geometry across the file – this will display on the right.
Avoid selecting large areas – we want a small, specific selection, else the software can include entities we don’t want within the import.
If the drawing is well organised, this process is often enough. If it isn’t, you can refine the filter by adjusting layers, colours or line types until only the data you want is included.
Tip
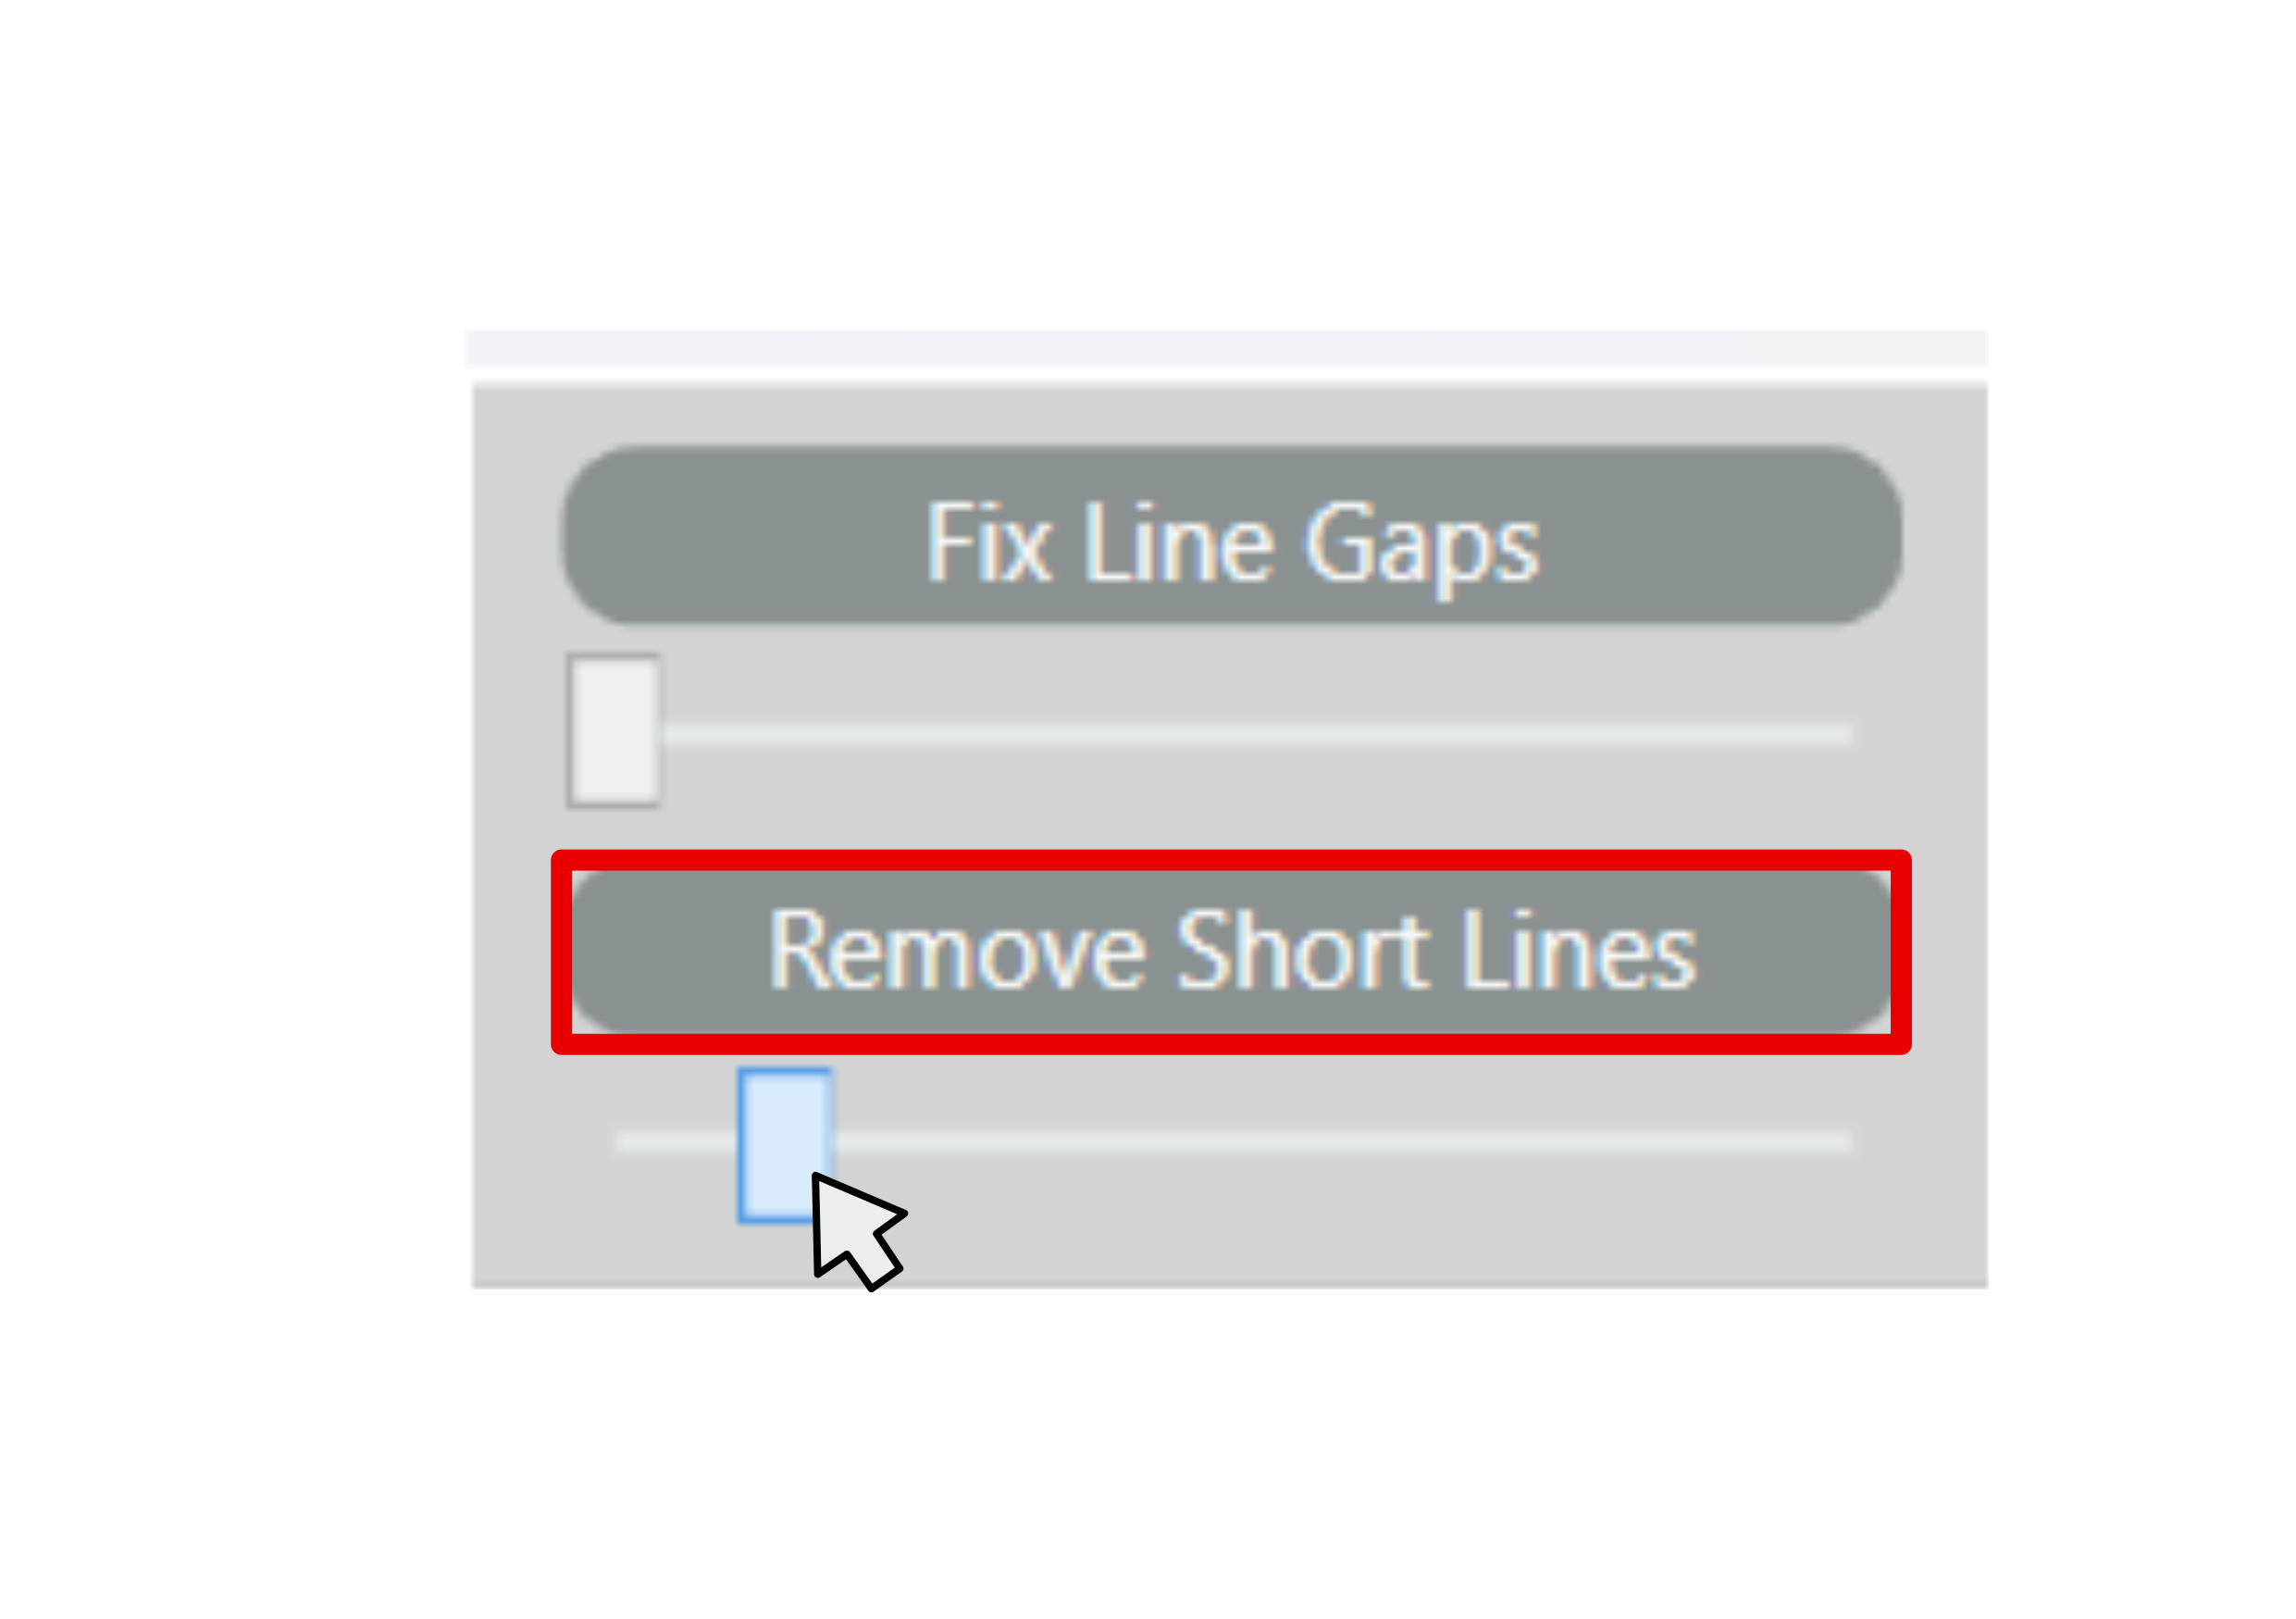
At this stage, it can be worth using the Remove Short Lines function to filter out unwanted data, i.e. text that shares the same properties as other geometry. Since these objects are usually much shorter than genuine geometry, the Remove Short Lines option provides a quick and easy way to remove them.
Step 4: Review before importing
Before confirming the import, take a moment to review what’s been selected.
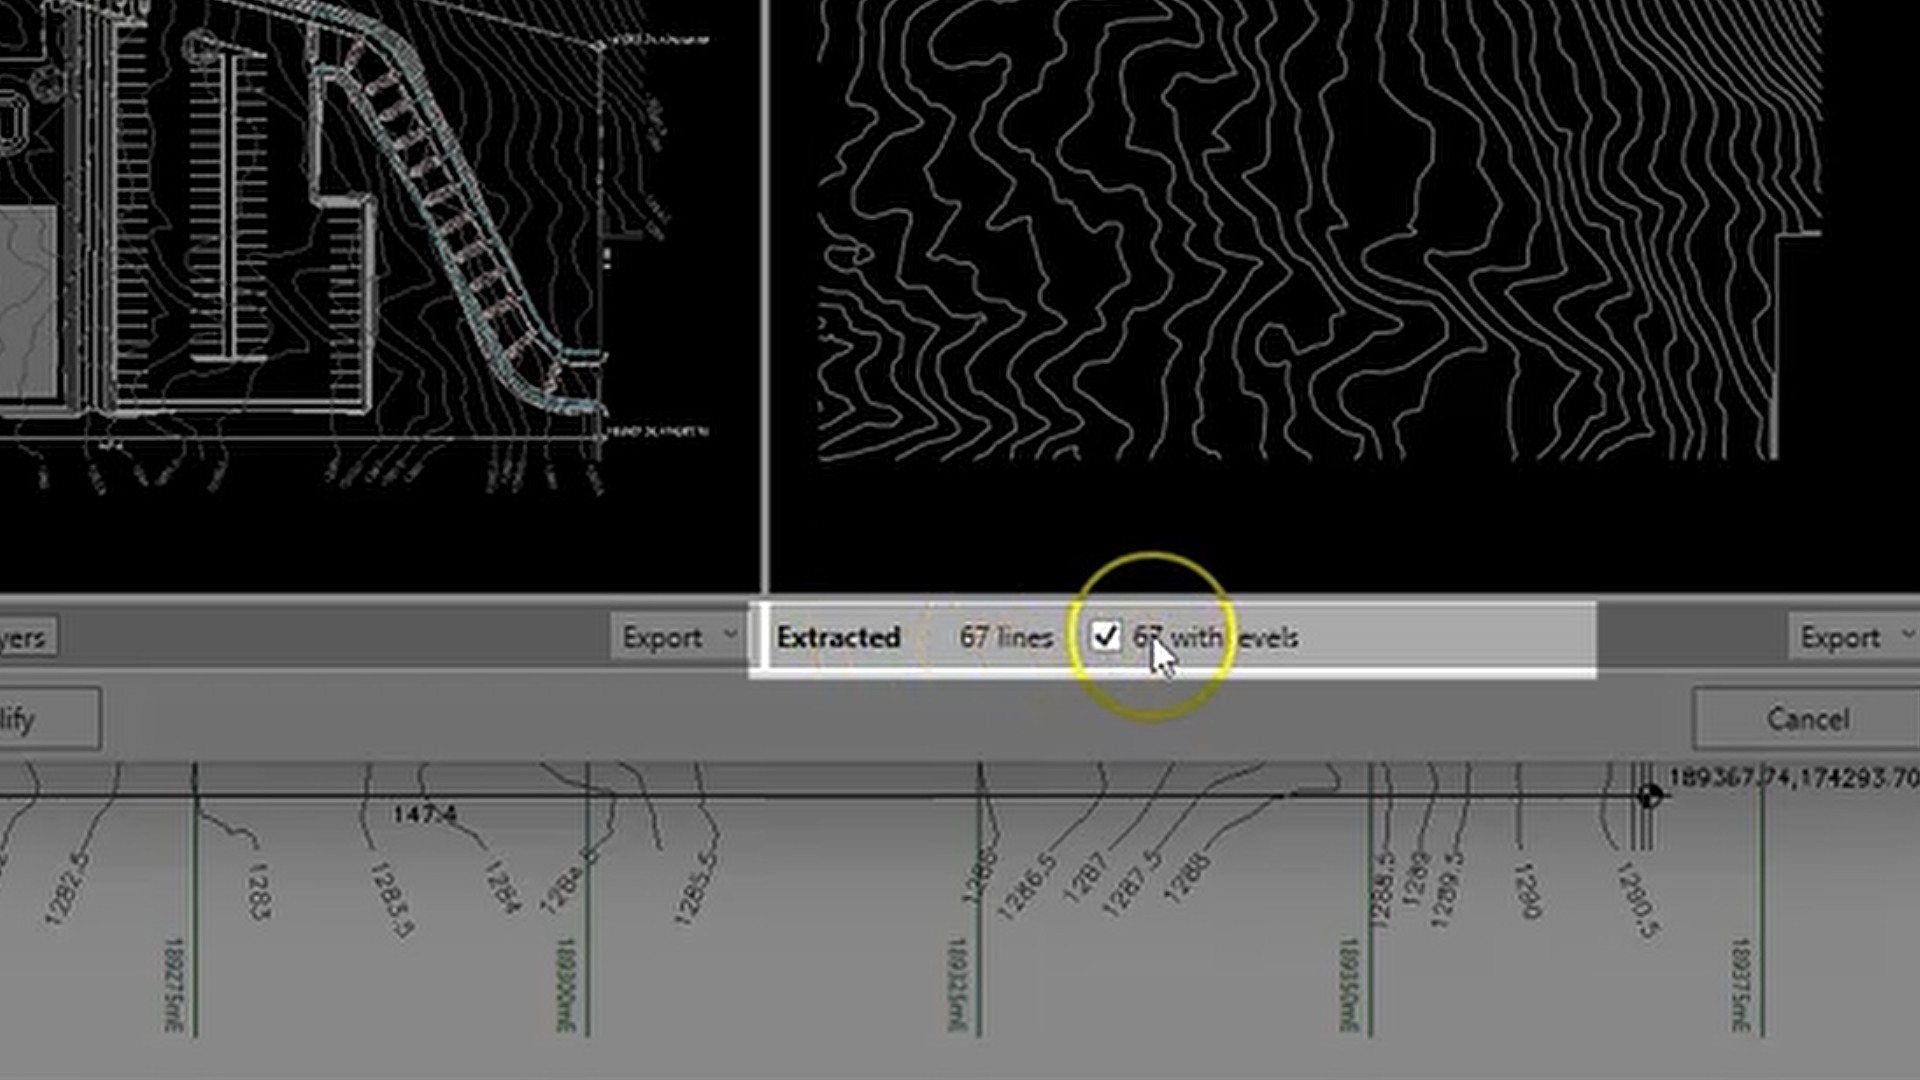
Cubed will show how many entities have been extracted and how many don’t include elevation data. These are really strong indicators of accuracy – if you expected levels but none appear then the file may have been flattened, whereas if more lines have come in than expected then the filter probably needs refining.
You can also crop the selection area at this stage. This is especially helpful if you are only working with a small section of a larger site.
Step 5: Import and tidy up
Once you’re happy, go ahead and import the data.
A bit of cleanup usually helps – for example, in the video we use Simplify on the contours.
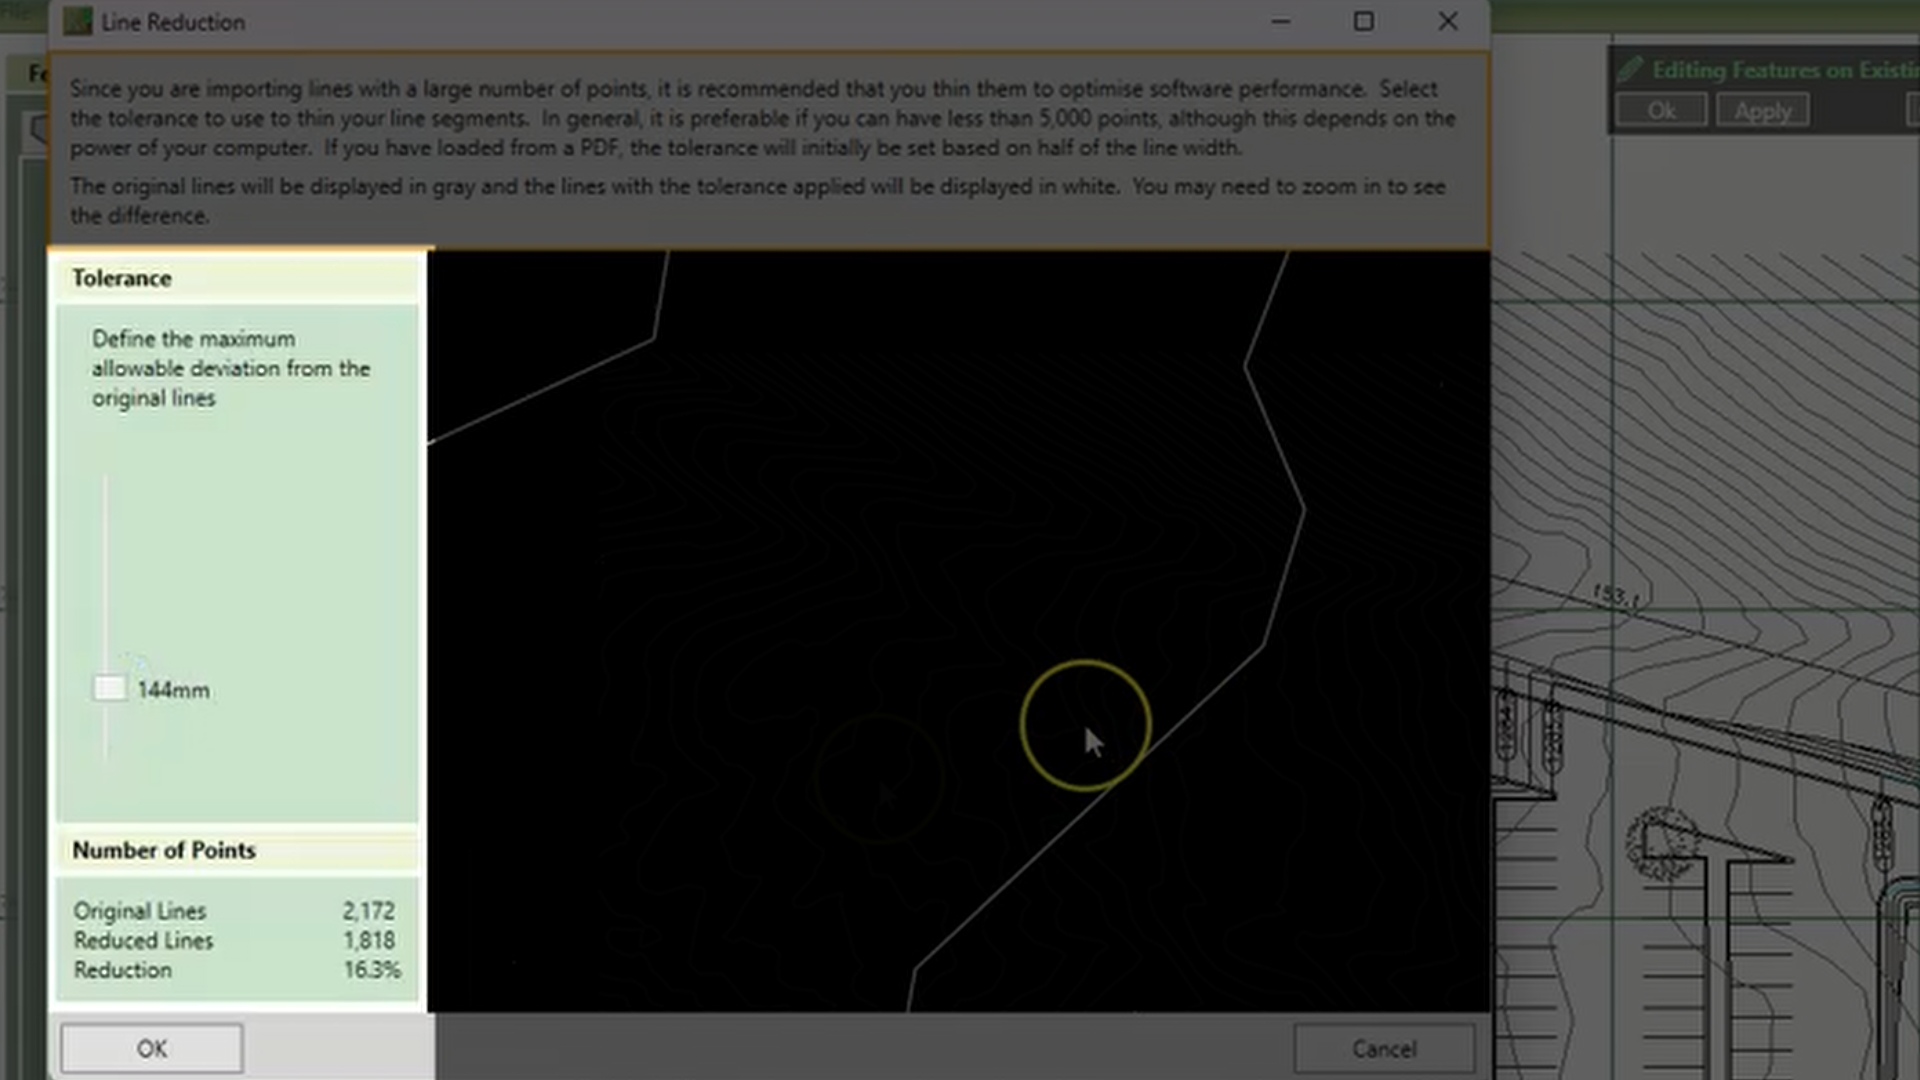
Most CAD files have far more points than you actually need, so this is an easy win. Simplifying reduces the number of points while maintaining the overall shape, which improves overall performance with minimal detail loss.
Ready to try?
Feature-Specific Workflows
Once you’ve mastered the basic import process, the workflow is largely the same for different feature types. However, each type of CAD data has its own quirks and best practices. The sections below cover the most common elements you’ll import into Kubla Cubed and highlight a few tips to help you get the best results.
Working with Breaklines
Breaklines follow the same process as contours, but often need a bit more input.
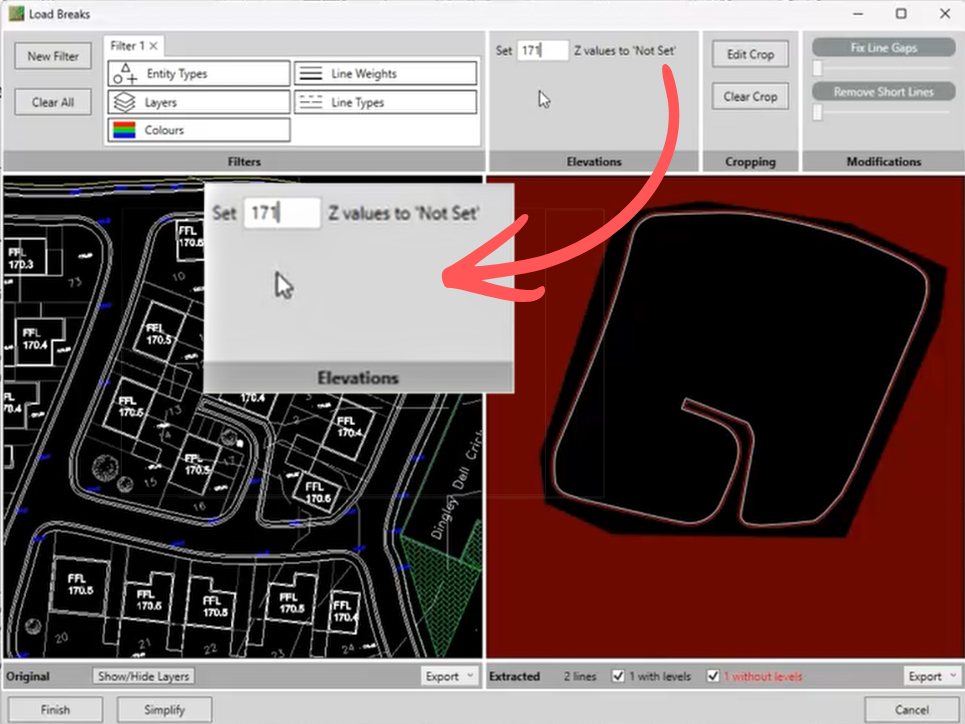
In ideal cases, they are 3D polylines with elevations already assigned. More commonly, they are 2D lines with levels shown as nearby text.
A practical approach is to:
-
-
- Import the breakline geometry first
- Set elevations to “Not Set”
- Add known levels at key points
- Allow Cubed to interpolate between them
-
It’s a bit manual – but it keeps the shape of the breakline intact, which is what really matters.
Working with Points
Points can appear in several different formats in CAD, so the workflow is slightly more flexible.
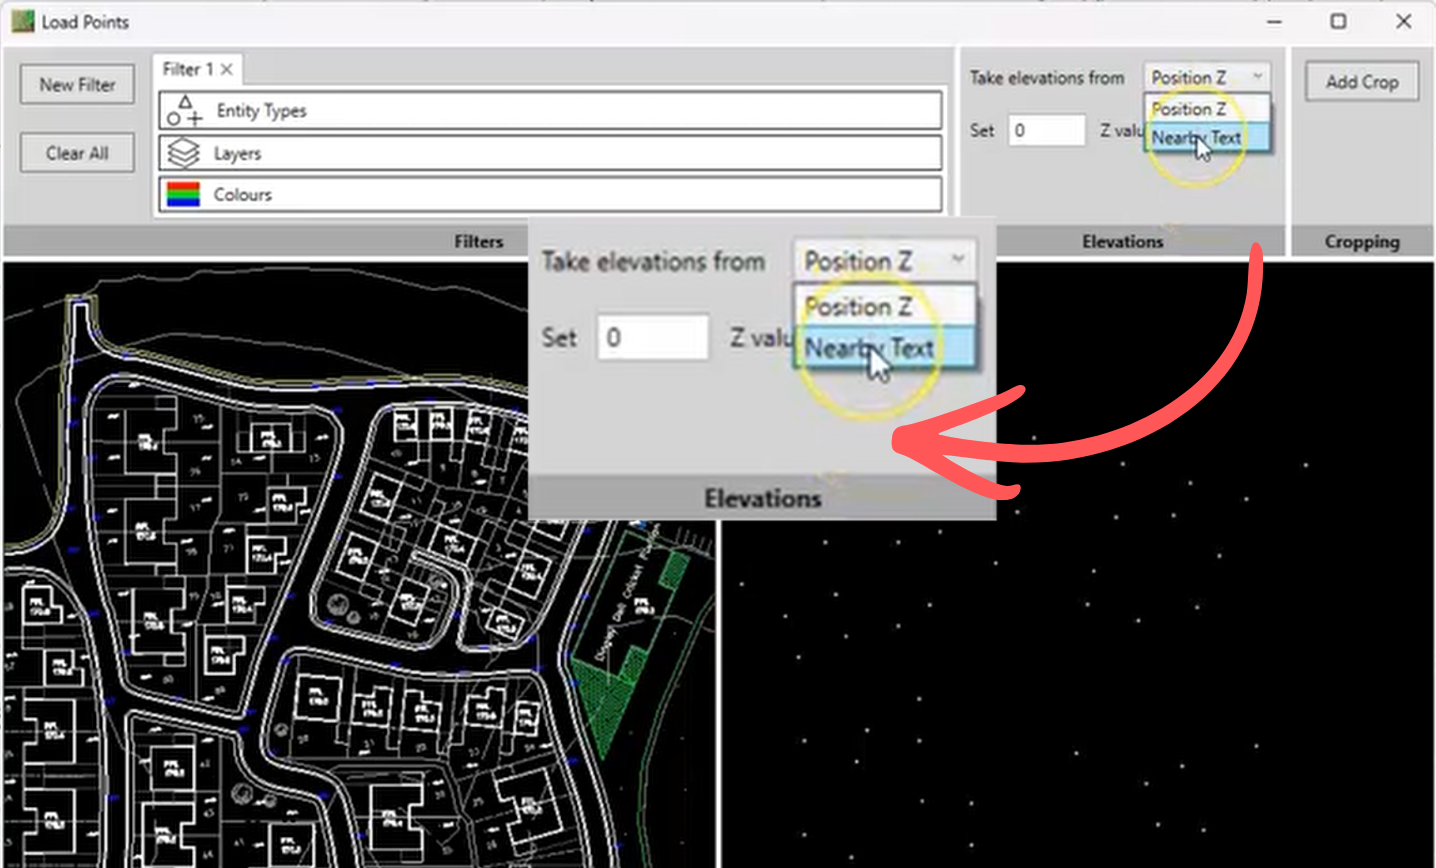
It can pick up point entities, blocks, or even text. The main thing is deciding where the elevations come from.
If the file contains true 3D data, use Position Z. If it doesn’t and the data has been flattened, use Nearby Text and the software will match elevation labels to the points.
This works well in most cases, but it’s always worth checking the results afterwards.
Boundaries and Outlines
Boundaries are one of those small things that can cause confusion. For the software to recognise an outline, the line must be closed.
Even small gaps will prevent an outline from being detected. If that happens, the simplest fix is to import the line as a contour or length, close it in Cubed, and then copy and paste it into the outline tab.
Tip: Using “Not Set” Elevations
One useful technique when working with imperfect CAD data is to use a placeholder elevation value.
CAD does not have an equivalent to Cubed’s “Not Set”, but you can assign a value such as 0 or -9999 in CAD and convert it during import.
It’s a simple thing but is particularly helpful when working with incomplete elevation data.
Final Thoughts
The key takeaway here is that importing CAD data into Kubla Cubed is not about the file alone, but about how you work with it. There isn’t really a one-click CAD import that works perfectly every time. What Cubed gives you is the tools to isolate the right data and ignore what you don’t need, which will ultimately allow you to build a clean surface from an imperfect file.
Once you are confident with filtering and the import process, you can take almost any CAD file and turn it into a usable terrain model quickly and reliably. And more importantly you can calculate your cut and fill volumes quickly and accurately.
Ready to Explore?
CAD Import FAQs
Key take aways from the video and article
▼ Can Kubla Cubed import DWG and DXF CAD files?
Yes. Kubla Cubed supports importing both DWG and DXF files as Site Plans.
During the import process, the software interprets CAD geometry and converts it into native Kubla Cubed elements such as contours, breaklines and points, ready for earthworks modelling and cut and fill calculations.
▼ Why isn't my CAD file importing correctly?
Most import issues are caused by the source drawing rather than Kubla Cubed. Common problems include incorrect scale, unreliable insertion units, flattened 2D data, or poorly organised layers.
Checking the drawing scale before importing and creating a well-defined filter usually resolves these issues.
▼ How do filters improve CAD imports?
Filters allow you to import only the data you need instead of the entire drawing. By selecting a representative example, Kubla Cubed automatically identifies similar geometry throughout the file. You can then refine the results using layers, colours or line types to produce a much cleaner terrain model.
▼ Can Kubla Cubed work with CAD files that don't contain 3D elevations?
Yes. If your CAD drawing doesn’t contain embedded elevation data, Kubla Cubed provides several ways to create an accurate terrain model.
For example, you can assign elevations from nearby text labels, manually add spot levels to breaklines, or use “Not Set” placeholder value for 0 or a defined value during the import process.
▼ Should I simplify imported CAD data?
In most cases, yes. Many CAD files contain far more points than are needed for accurate earthworks calculations.
Using the Simplify tool reduces unnecessary points while maintaining the overall terrain shape, resulting in faster performance and easier editing with little or no loss of accuracy.