Importing Survey Point File (.CSV, .XYZ, .XLS, .UAV)
With the first phase (called 'existing') selected, add a new element of the type 'Feature Surface' from the earthworks panel in the top right. This element will act as container for the data to be imported. Your survey files will contain points stored in text based format, typically .csv, .xyz, xls, or .uav (e.g. mydata.csv).
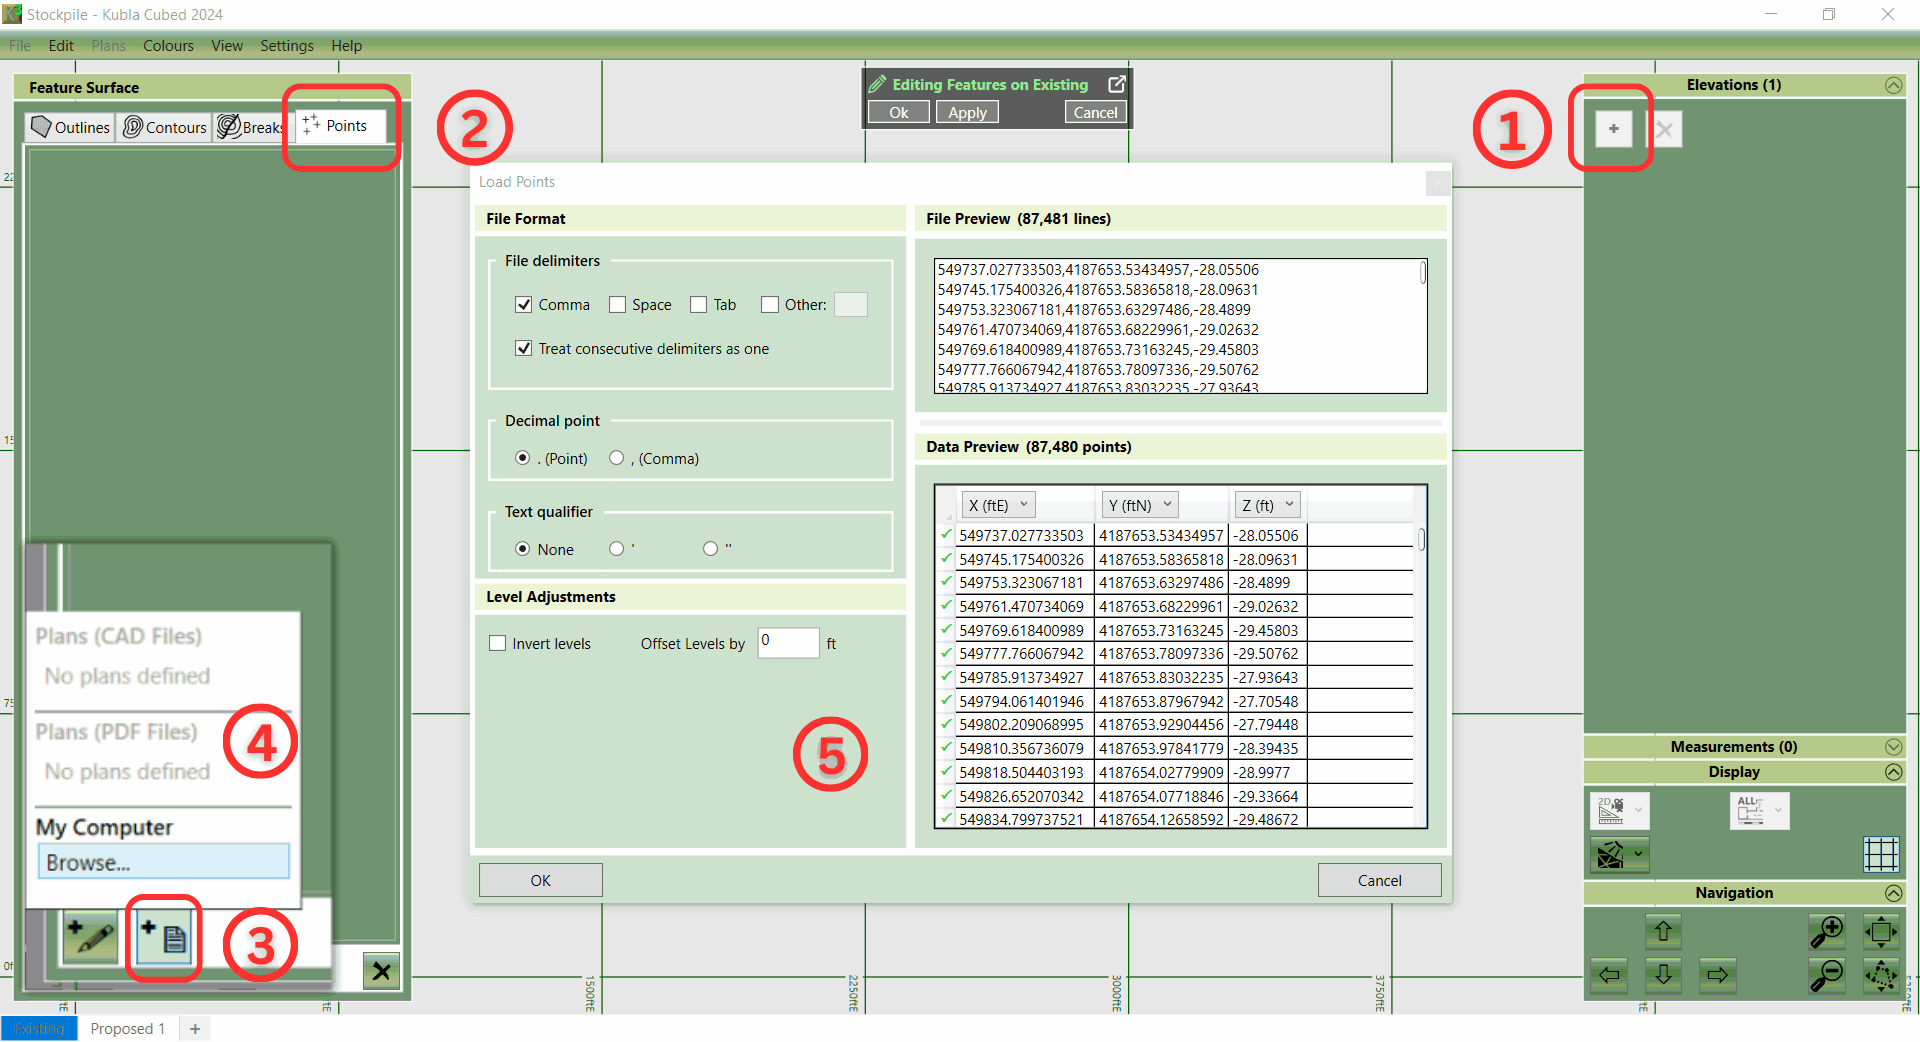
- ① Open the 'Feature Surface' for your new project.
- ② On the left-hand side, you will see a panel with four headings (Outlines, Contours, Breaks, and Points). Since you will be editing points, make sure to select the fourth tab, 'Points'.
- ③ In the bottom left corner, locate the second button, 'Add Points from Site Plan or File.' Hover your mouse above the button to view a tool-tip, ensuring you are selecting the correct option, then left-click.
- ④ Choose the file you want to import when prompted.
- ⑤ A new window will appear, allowing you to modify the file format settings. Confirm that the X, Y, Z columns in your file are correctly displayed in the table. Once satisfied, click the OK button to load the points into your project.
- To complete the process, add the boundary outline of the stockpile. Select the first tab at the top of the panel, marked 'Outlines.' Click on one of the buttons at the bottom to either create or load an outline. For creating an outline, choose between 'Automatic' and 'Draw.' Automatic will shrink-wrap the points, with the process being software-controlled. A preview with a fidelity slider is provided before completion. Drawing the outline manually is human-controlled. Alternatively, if you have a PDF or CAD file with the outline defined, import it by adding from the file, as mentioned previously.
Additionally, if your stockpile has been defined in a CAD or PDF format, then there is also the option to add points, contours and break lines from these files by selecting a sample entity of the points/lines you want to import. Go to the CAD import section for more details.