Adding a Site Plan
Site Plans can be added from PDF, CAD, and Image. To load a new site plan, click on Plans in the menu bar and then select either Add PDF file, Add CAD file or Add Image File. You will be prompted to choose the file you want to load. If you opt for a PDF file with multiple pages, you will be prompted to select the specific page to load.
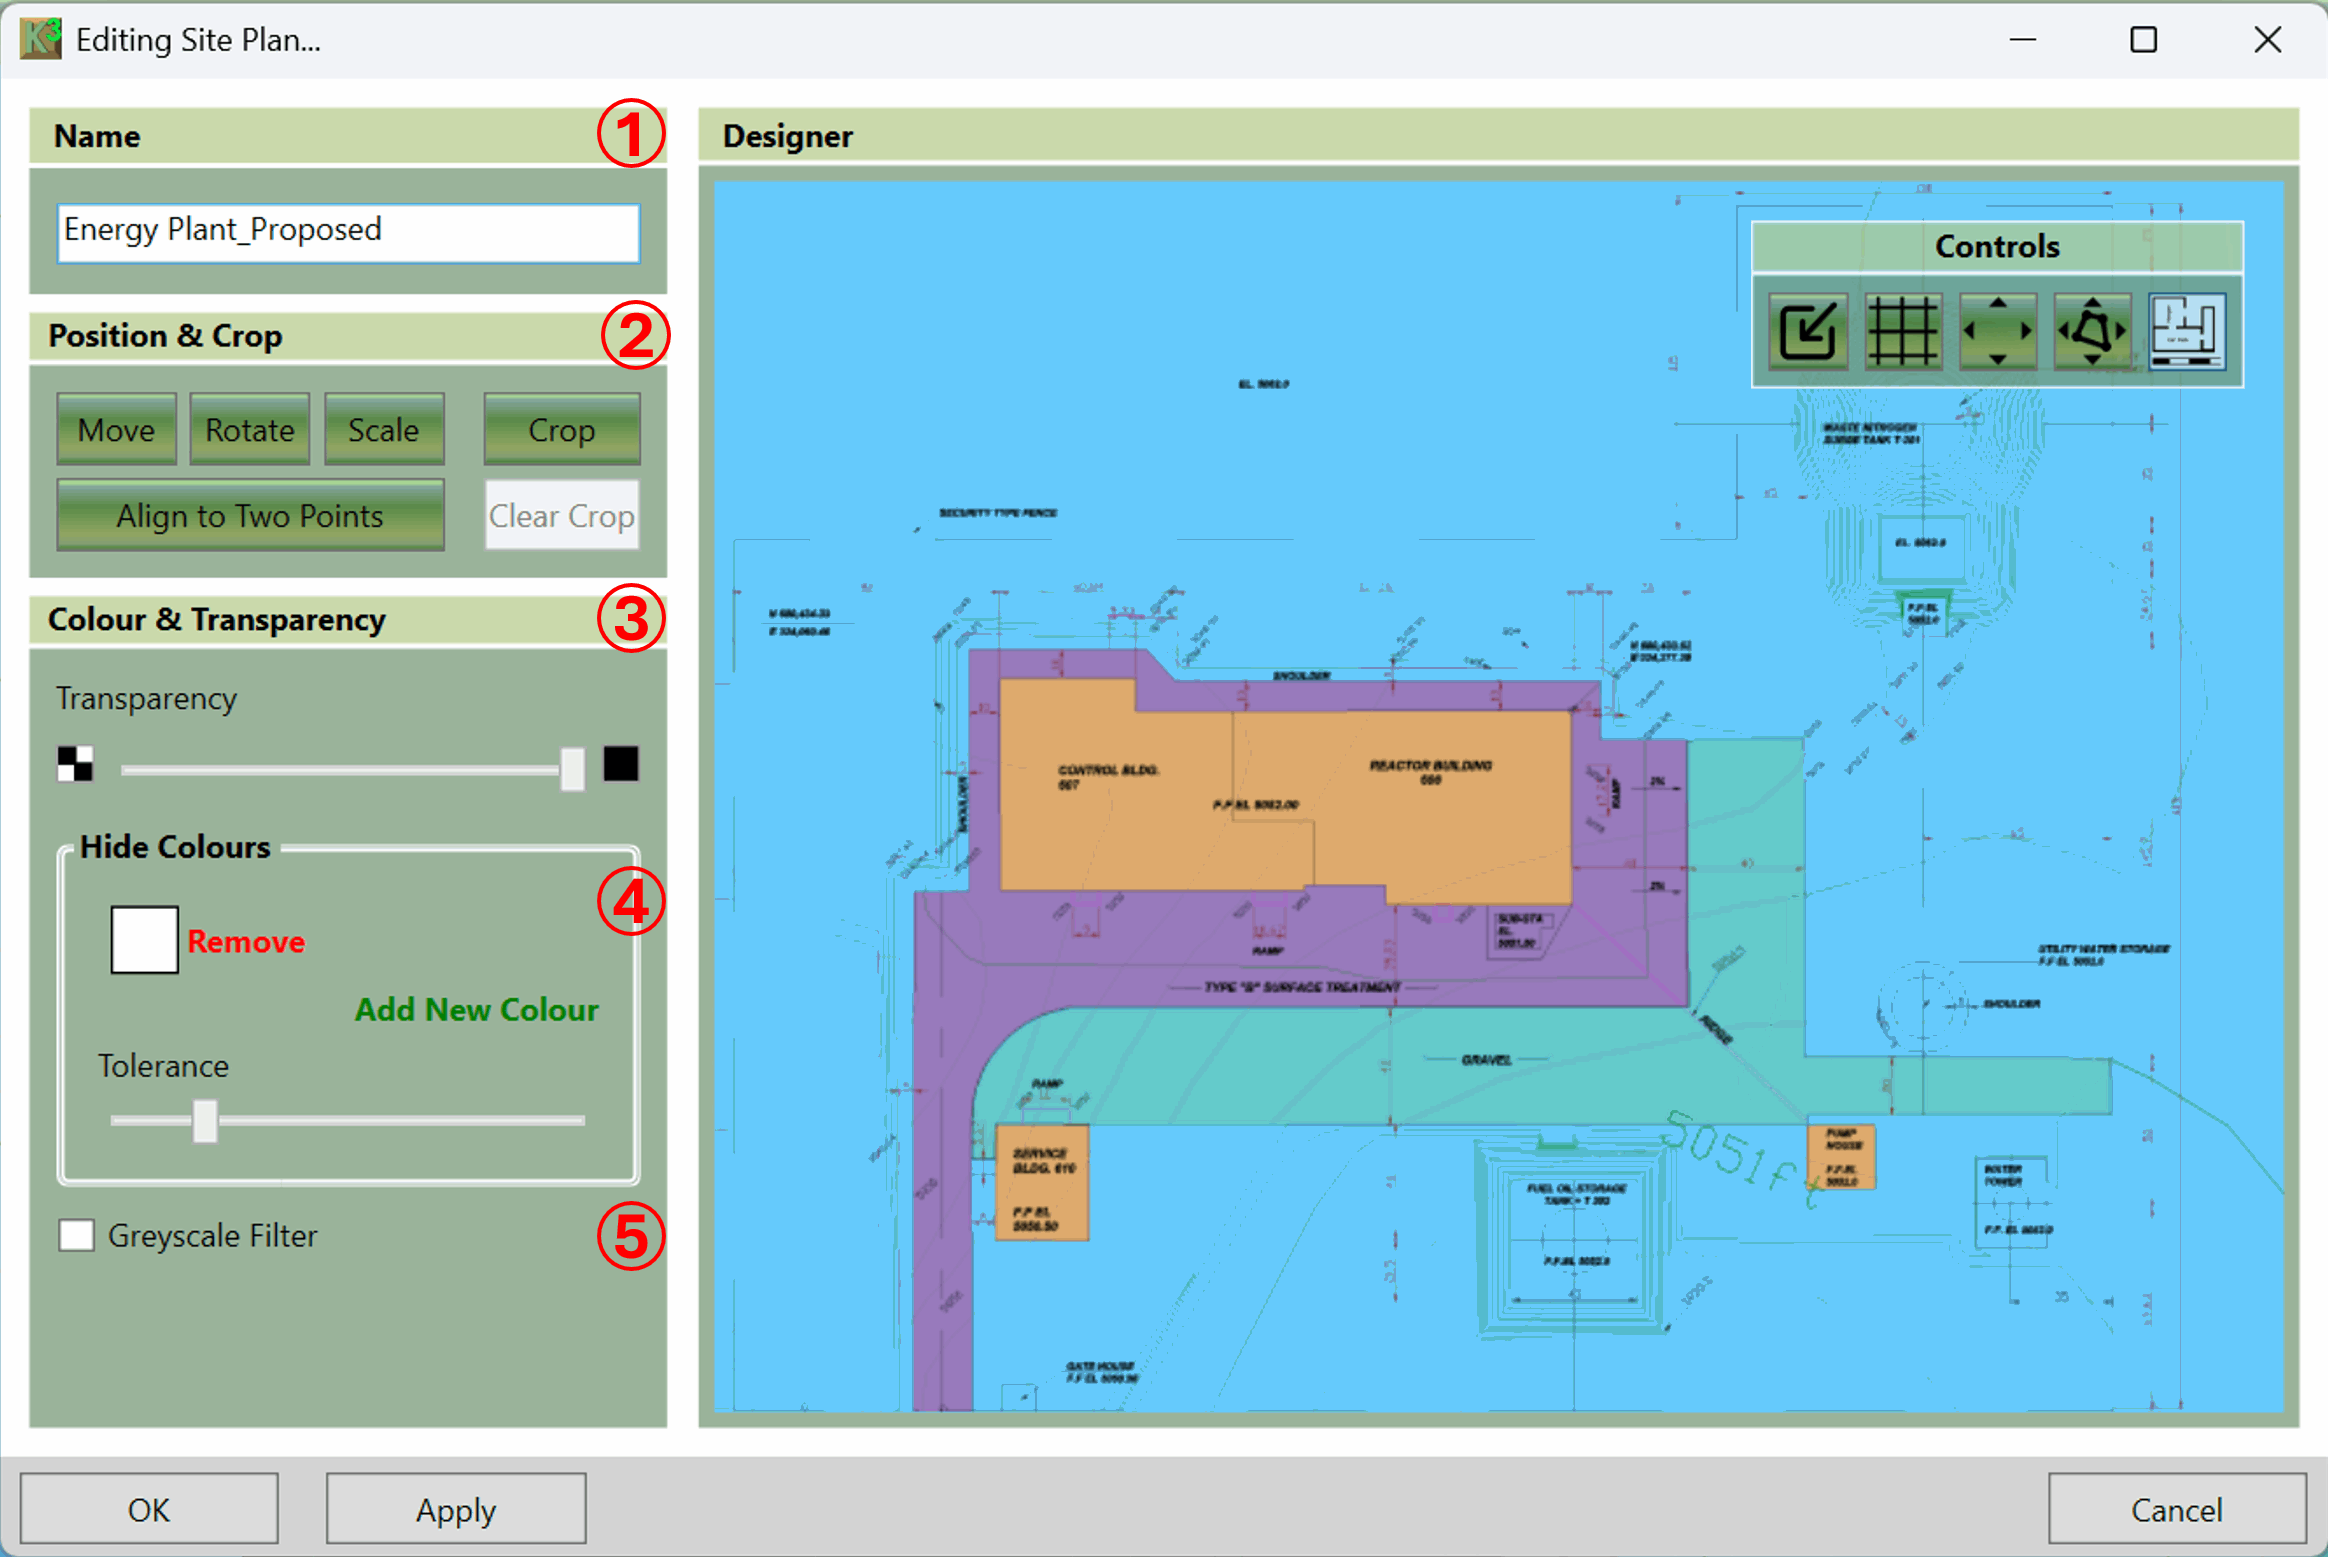
After this, the following window will be displayed:
The different elements of this window are summarised below. They are described in more detail in subsequent sections.
- ① This is where you can rename the site plan. Useful for distinguishing plans, when adding multiple pages.
- ② This is where the position and scale of the loaded image, in the real world, will be specified. You can also choose to crop the image if you wish. This option is particularly useful for drawings with title blocks that you want to remove.
- ③ Moving the transparency slider to the far left, makes the site plan totally invisble, while a slide to the far right may conceal the topography underneath. Anywhere in between provides varying levels of visibility, allowing the user to see a mix of the topography and plan.
- ④ This is where you can opt to hide colours from the site plan, ensuring that the cut and fill is not obscured.
- ⑤ Greyscale Filter option converts an image's colours to a grey range, with black or white at the extremes. This would be present below the 'Hide Colours' box but is not available for CAD (e.g. dxf) site plans.
The settings for image position, crop, and the transparency are described further in the following sections.