Colour Keys
The shading schemes used to display the terrain and earthworks are customisable by the user. Kubla Cubed comes with a number of pre-set colour tables with options for user customisation, such as choosing between discrete and beleded shading.
Additionally, users have the capability to generate their own colour tables for fully customised output.
- Match Ground Shading - Ground Levels.
- Shade Earthworks Levels - Ground Levels and Earthworks Levels.
- Shade Earthworks Cut & Fill - Ground Levels and Earthworks Cut & Fill.
- Colour Elements - Defines each element with its own colour to show overriding elements. Colours can be edited in Elevations panel. See Element Shading.
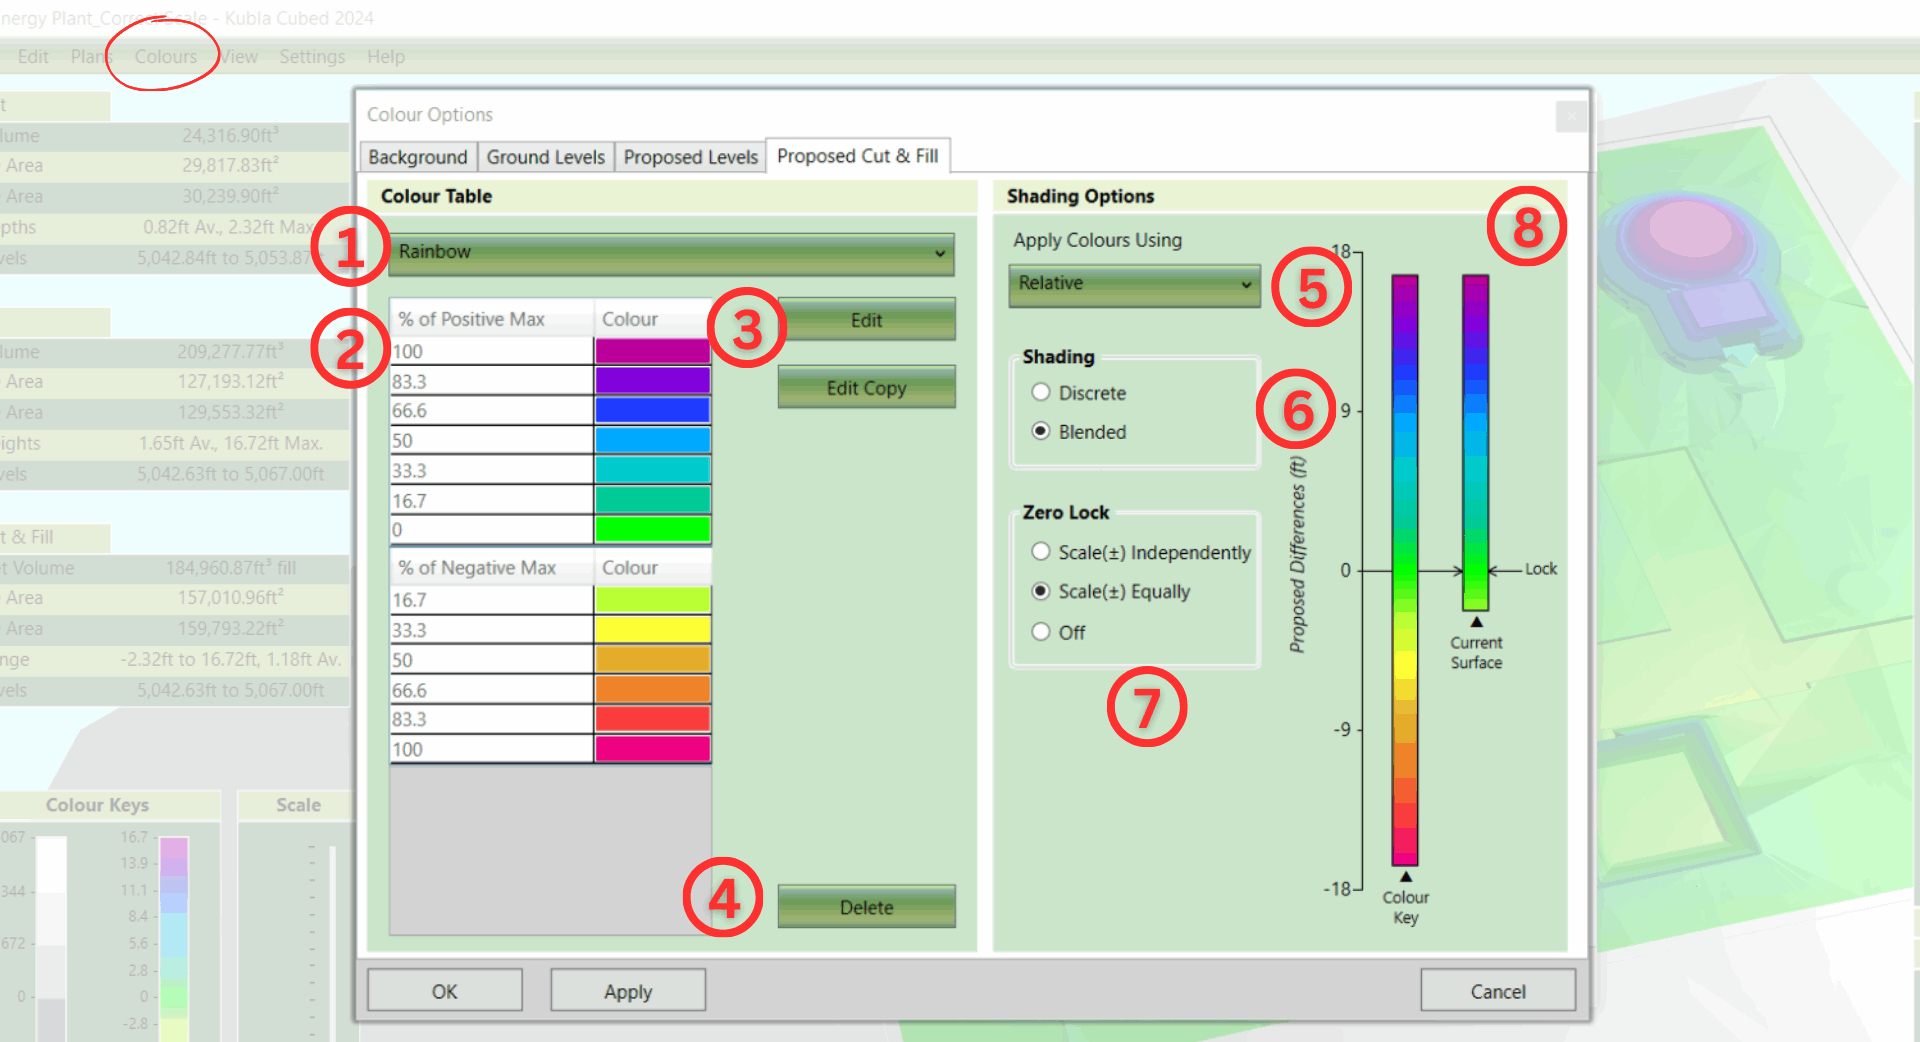
A shading scheme consists of a table of colours with corresponding values ②. There is a library of these colour tables to choose from, and a shading scheme's colour table can be changed by selecting a different one from a drop-down box ①. You can manage the library of colour tables by deleting ④ those that are no longer needed, as well as creating and amending existing ones with the Edit or Edit Copy buttons ③.
On the right-hand side of a shading scheme tab, there are options for controlling the way the colour table is applied to a surface (i.e. the existing ground or earthworks). When you select different options, the diagram ⑧ updates to display where on the surface the colours will be applied.
- Relative: A shading scheme using the relative shading will scale the scheme to fully cover the surface being shaded. For this reason, in relative mode, colour table values show as percentages. This method ensures that the surface uses the full range of colours in the table, adapting as the design changes.
- Absolute: The absolute method applies colours using the exact values in the table, providing total control over where the colours are applied on the surface. However, it does not adapt when new terrain is loaded or earthworks changes, so it may need to be manually adjusted when there are significant alterations to a project.
Shading ⑥ - There are two different shading options: Discrete and Blended. With Discrete shading, colours are not blended, resulting in discrete blocks of the same colour. When Blended is selected, the surface is shaded by smoothly interpolating between the colours in the colour table. See the image below for an illustration of the difference between these two shading modes.

A consequence of using an absolute scheme with discrete shading is that the last colour in the table will not be used. This is because the first two values are used for the range of the first colour, the second and third for the next, and so on, resulting in the last colour being redundant. In relative mode, the values are adjusted to make use of all the colours in the table.
Zero Lock ⑦ - When shading a surface, it's often necessary to lock a particular colour to zero. For example, when shading terrain, you might want a colour locked at zero to indicate the difference between land and sea, or to show the areas on a platform in different colours for cut and fill (in difference shading mode). With absolute shading schemes, this is simply a matter of setting a colour value to zero. However, with relative shading, it is a little more complex, as the 'zero' value moves as it scales to fit the surface being shaded.
- Scale ± Independently: This scales both positive and negative values independently, ensuring the colour table covers the entire surface. This is useful when aiming to display the full range of colours in the table for maximum contrast.
- Scale ± Equally: This option scales values above and below zero equally. It is useful in various situations, particularly for a cut and fill shading scheme, providing a sense of depths of cut compared to fill. However, with this option, not all of the values in the table will be displayed.

|
Learn about the shading scheme options in our video Adjusting Shading of Surfaces, featuring a demonstration on creating custom schemes. |