Project Checks
A computer model can only be as good as the data input to it. A frequently used industry phrase is 'GIGO' (Garbage In Garbage Out). Therefore, checking your input is essential to ensure that no mistakes have been made during the various stages of the project. The checks should be made after the data is input (e.g., check the site plan after it has been imported). However, we also recommended the following checks are done at the end of each project before producing reports...
 |
Verify that dimensions on the site plan are correct. Press and hold the 'M' key on your keyboard, then drag your mouse from the starting point ① to the endpoint ② over a known length ③. If the value ④matches that on the site plan, then you have scaled correctly. Be sure to pick a considerable length for comparison to eliminate the possibility of small inaccuracies going un-noticed. |
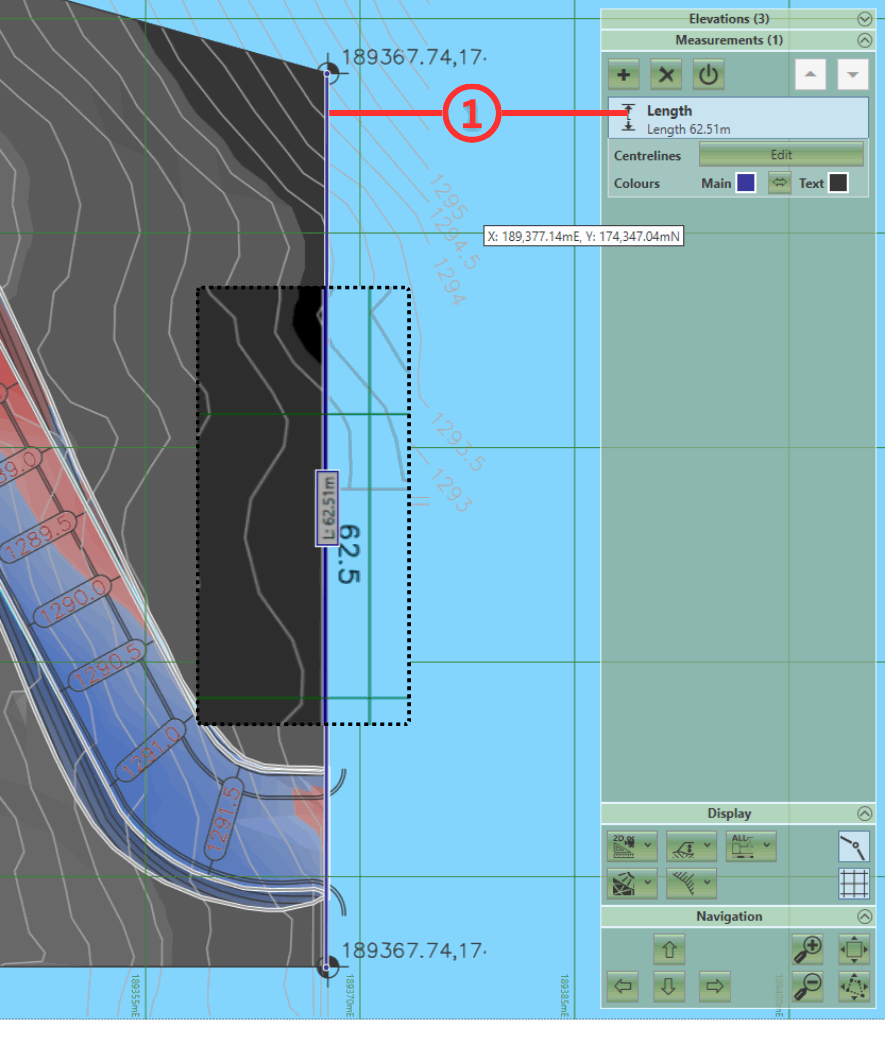 |
Alternatively, you can use the 'Length' Measurement element ①. Locate this element by double clicking on the 'Measurements' panel in the right-hand side of the program. For detailed instructions, see our Count, Length and Area Measurements video. The added benefit of this method is that the element remains in place and can be referenced each time new site plan edits are made, helping ensure nothing goes unnoticed or becomes 'broken'. |
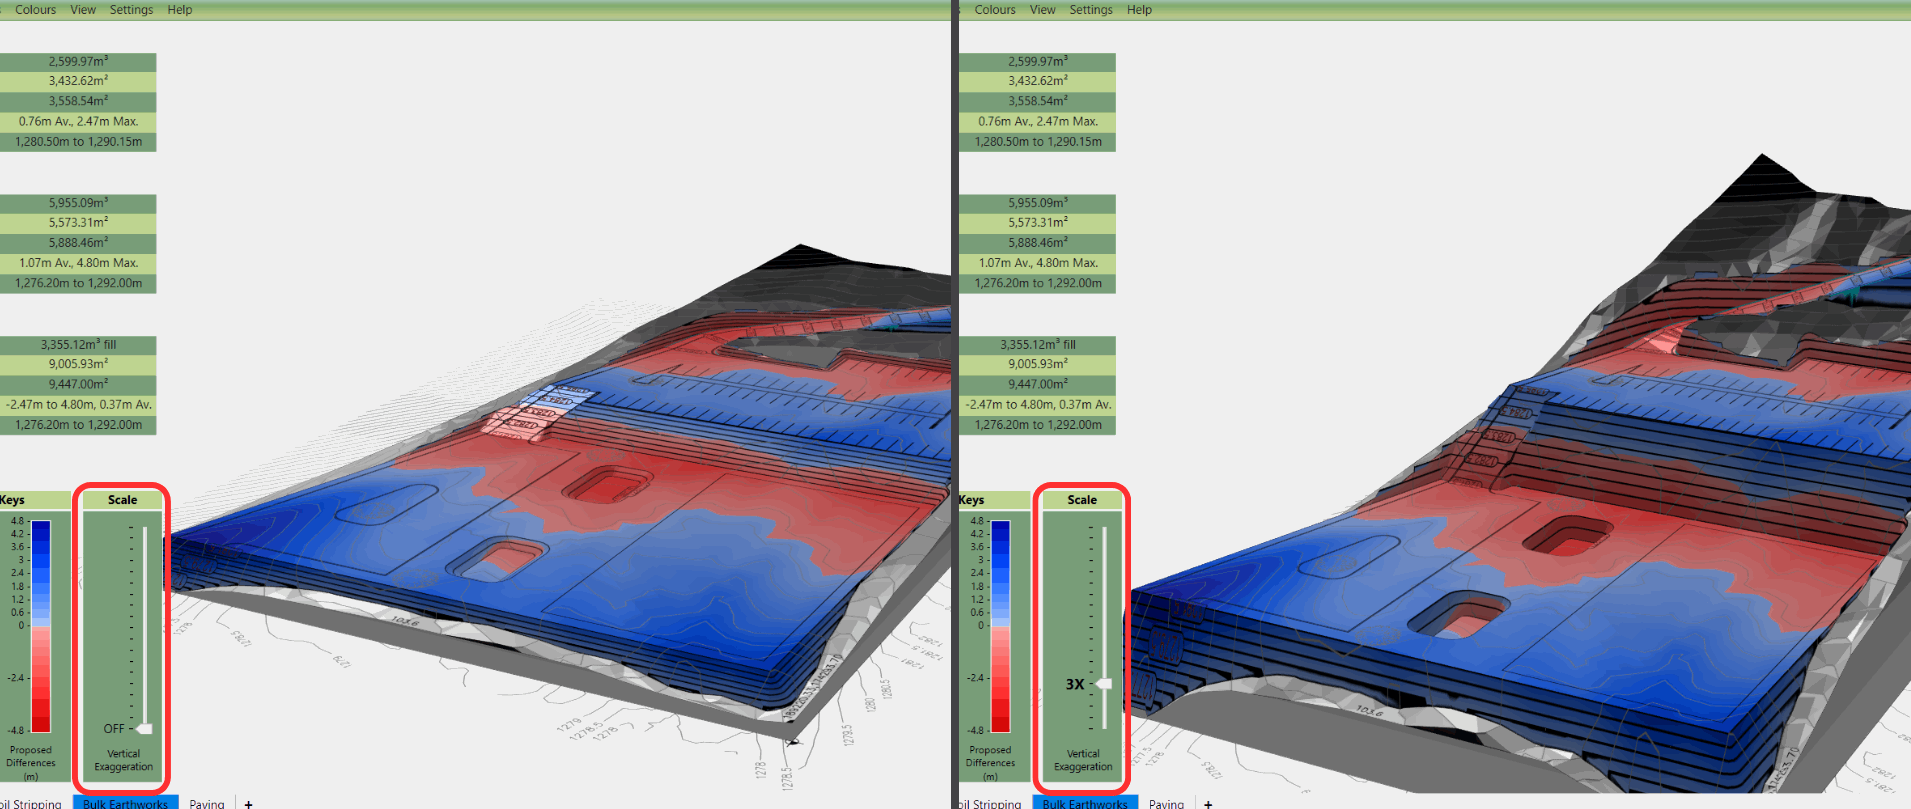 |
To help identify incorrect Z values and to a lesser extent, XY values, exaggerate the terrain height. Switch to one of the 3D cameras to show the Vertical Exaggeration Tool. Move the tool's slider up/down to highlight obvious mistakes such as height spikes. |
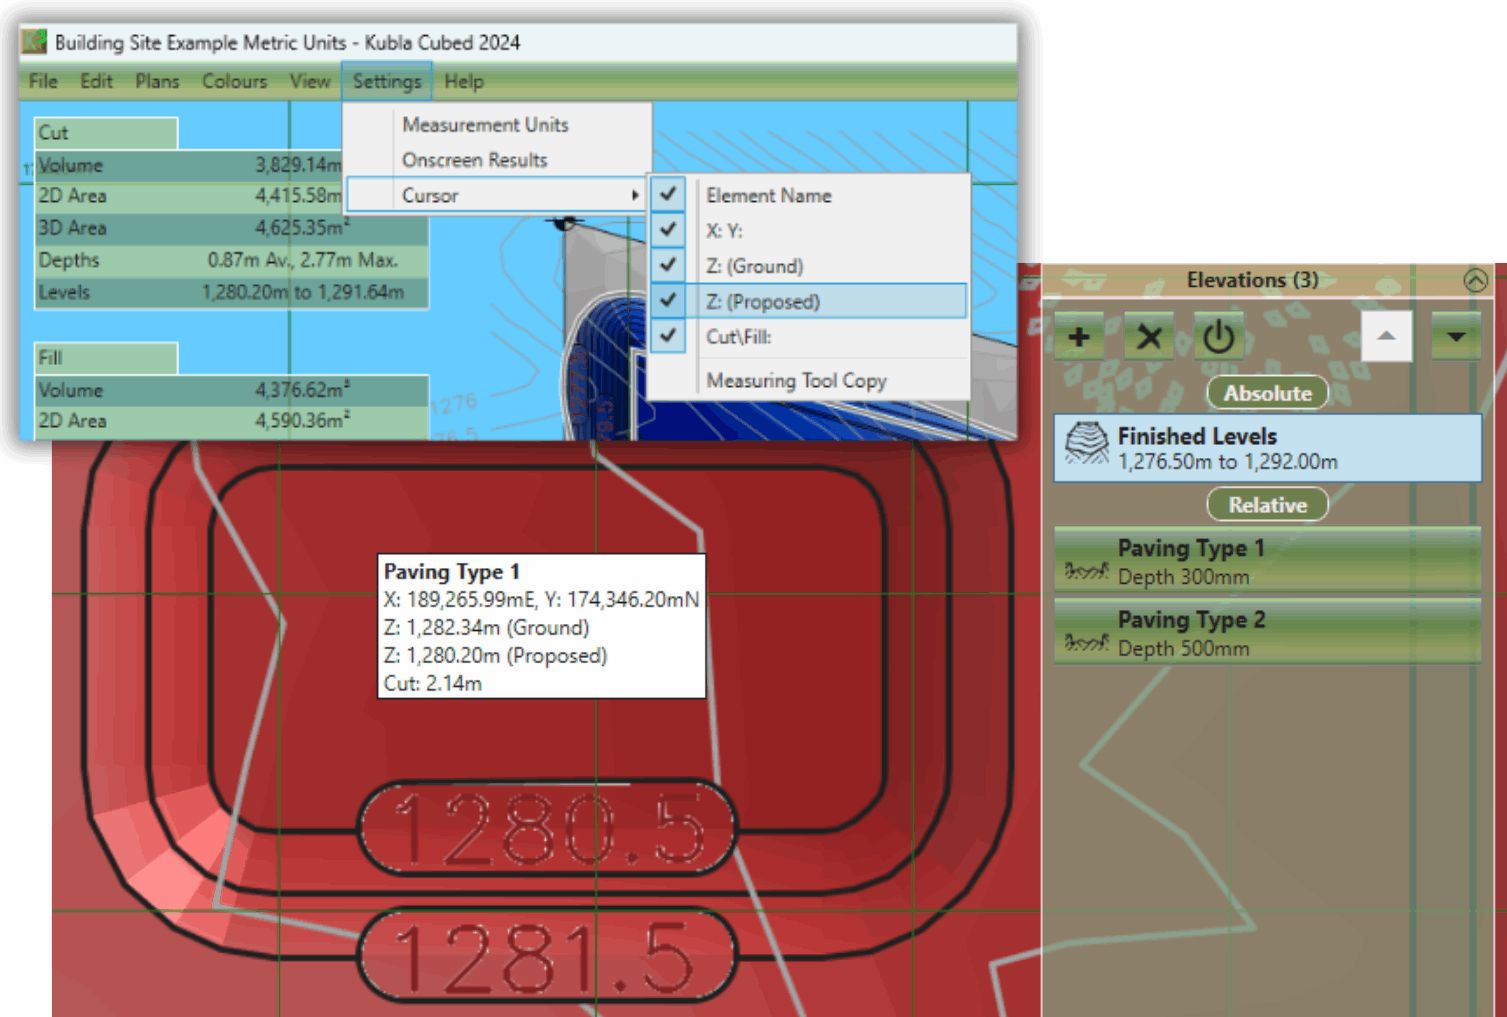 |
Going back to check each point's height individually would be a laborious effort. However, you can streamline the process by changing the cursor options to display the XYZ values and then mousing over the desired points. To do this, go to the menu, select 'Settings'. Within the sub menu 'Cursor', select the options X: Y: and then Z: (Proposed) and/or Z: (Ground). Now, when you hover your mouse over terrain, the selected dimension values will show the status beneath the cursor. |
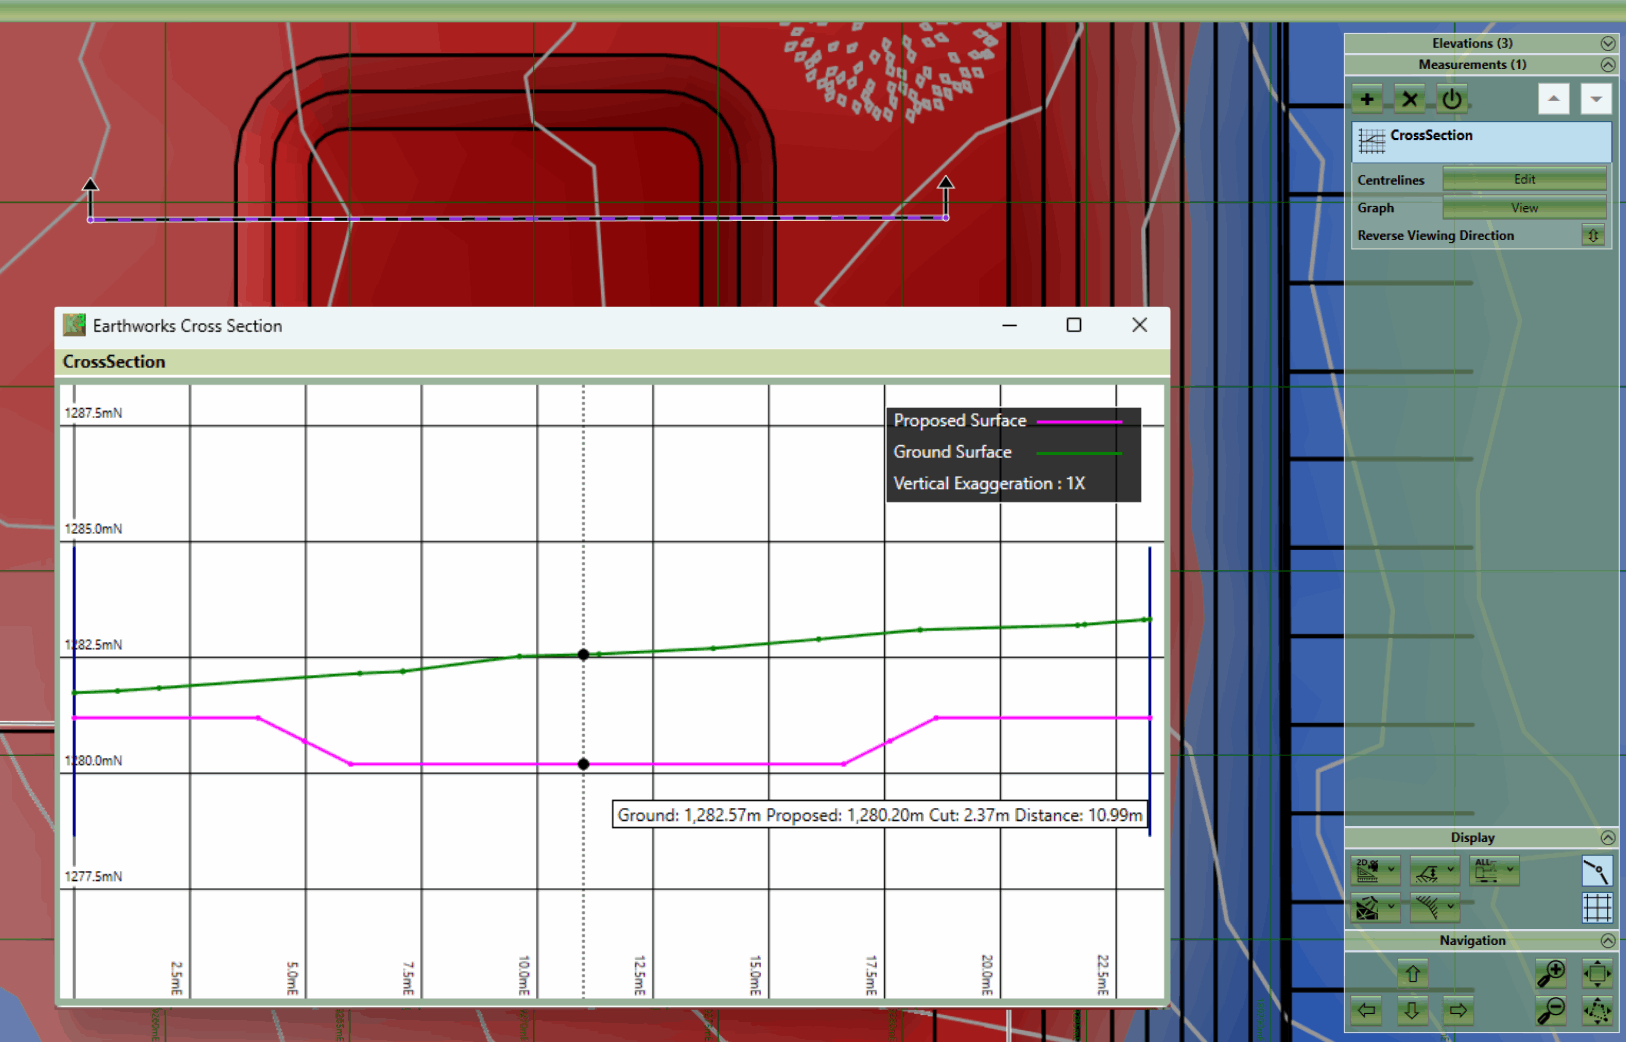 |
Draw a cross-section line across key areas of your site. View each section's graph within Kubla Cubed and examine where the proposed line rises above and falls below the existing. By moving the mouse across the graph, you can also check individual sections are precisely as expected under the cursor. |
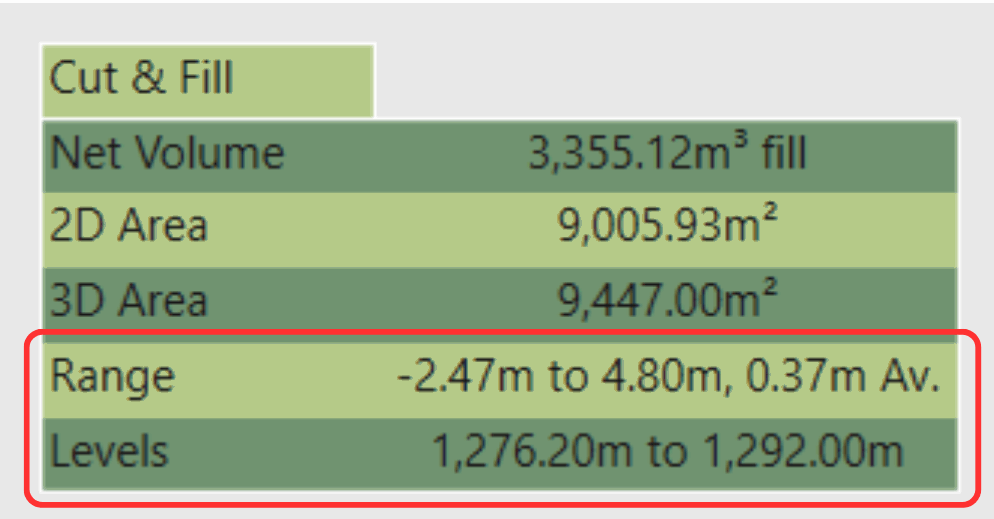 |
To help check for incorrect Z values refer to the on-screen Results Panel. located on the left-hand side. In the Cut & Fill table, examine the Range and Levels to ensure they align with your expectations. This can highlight any errors and you can then revisit your input data to make necessary corrections. |
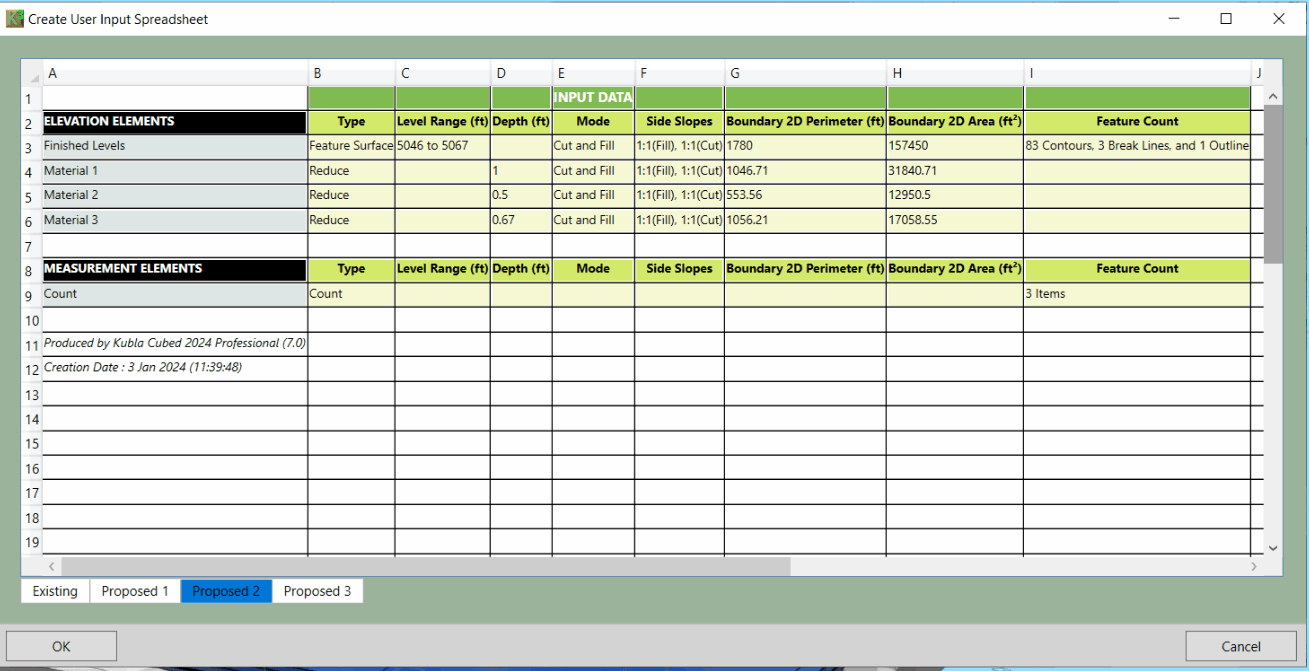 |
Once all your data has been input, navigate to the main menu, select 'File' -> 'Create Spreadsheet', and then choose 'Input Data'. Verify that the Spreadsheet's content matches your original input data. For example, if using the offset method, offsets are all set to a minus value. Also, check the level range of each element and height/depth values. |