With the existing surface complete, proceed to the 'Proposed 1' tab to create a 'Feature Surface' to calculate the volume of your stockpile by following the steps below:
- Add a 'Feature Surface' by clicking on the '+' button in the Elevations menu.
- Add a new manual Outline (pencil button) → select 'Draw' → 'Define Varying Levels
- Use your cursor ① to draw a boundary around the stockpile base, read the Ground Z elevation shown on the cursor label ② and type into the box ③, then click 'Continue' ④ or the 'Enter' key to add a new point to the boundary.
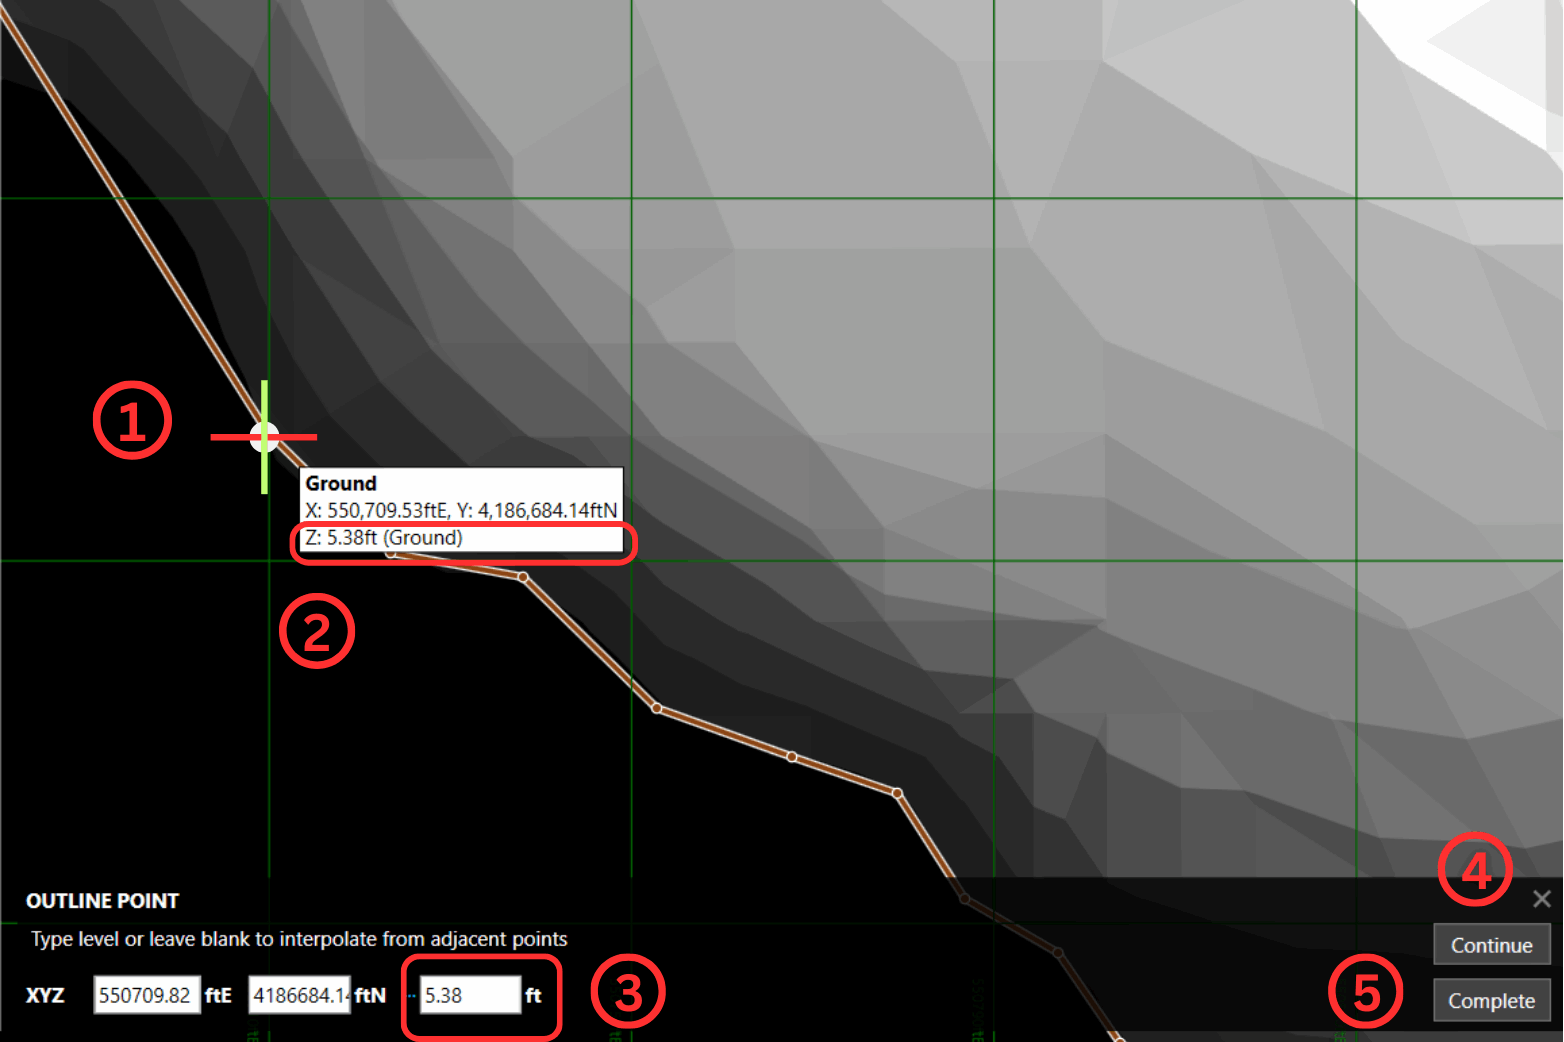
- Once the boundary has been defined, click 'Complete' ⑤ → 'Finish' → 'OK'.
- In the 'Elevations' panel, change the 'Mode' to 'Cut' only.
- Adjust the side batter, as needed.
- Using the 'Display' panel options, observe the 2D and 3D visualisations of the stockpile cut.
- The 'Cut' volume total is displayed on the left-hand side and in the estimation spreadsheet/report exports.
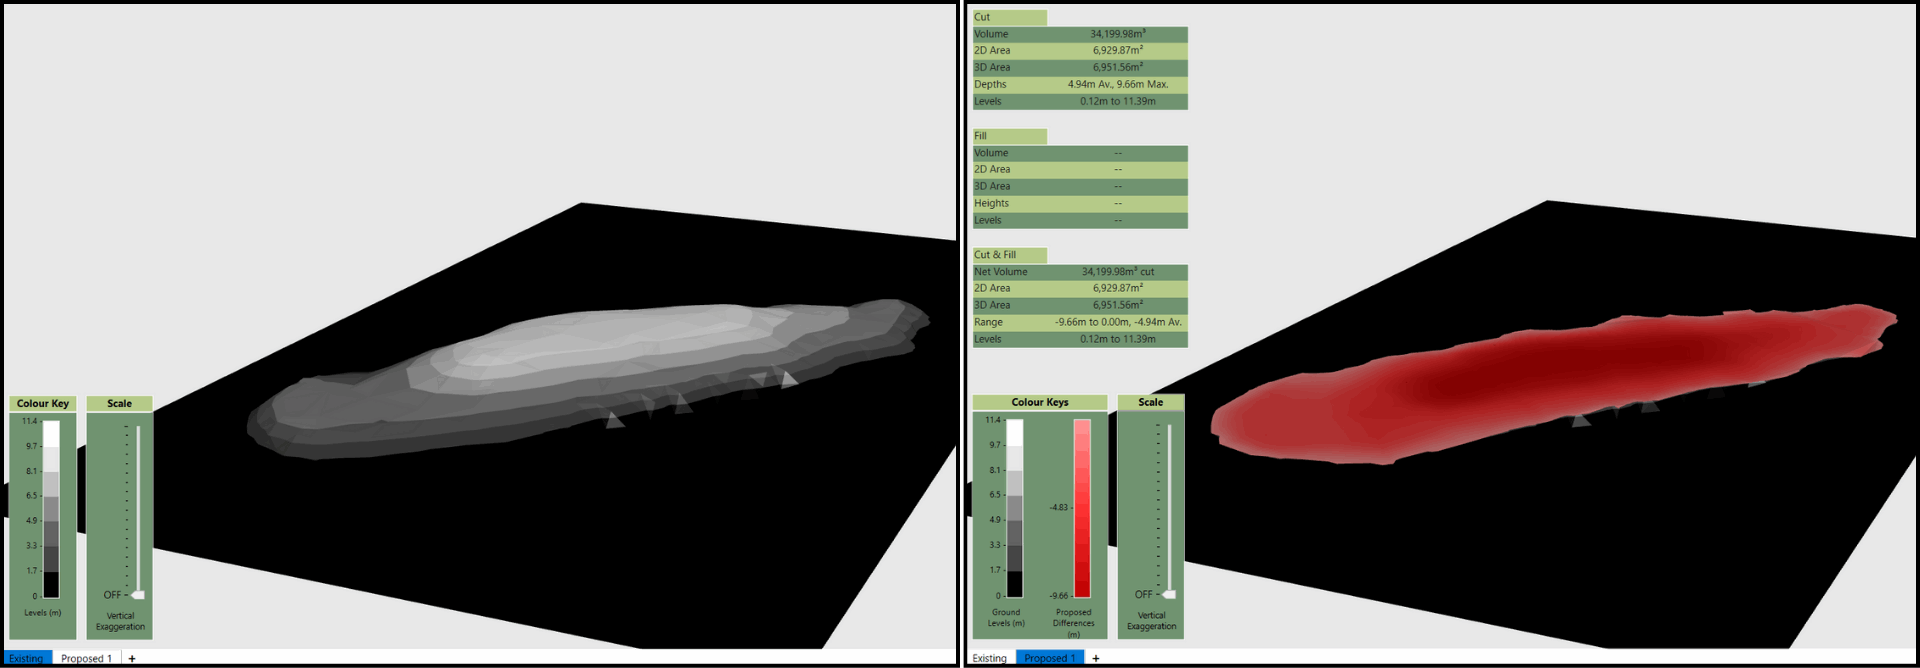
In this scenario, the survey data of the stockpile serves as the 'Existing' surface, while a flat area is designated as the 'Proposed' surface. After defining the stockpile elevations in the 'Existing' phase, they are adjusted to the Feature Surface Varying Levels Outline. The cut volume, indicating the volume of material to be excavated from the stockpile, can be found in the top left-hand corner of the interface, as well as in the export reports and spreadsheets.